# 3D Basics
- In the previous sections you've learned about the different building blocks to enrich your Flutter application with Augmented Reality using Wikitude.
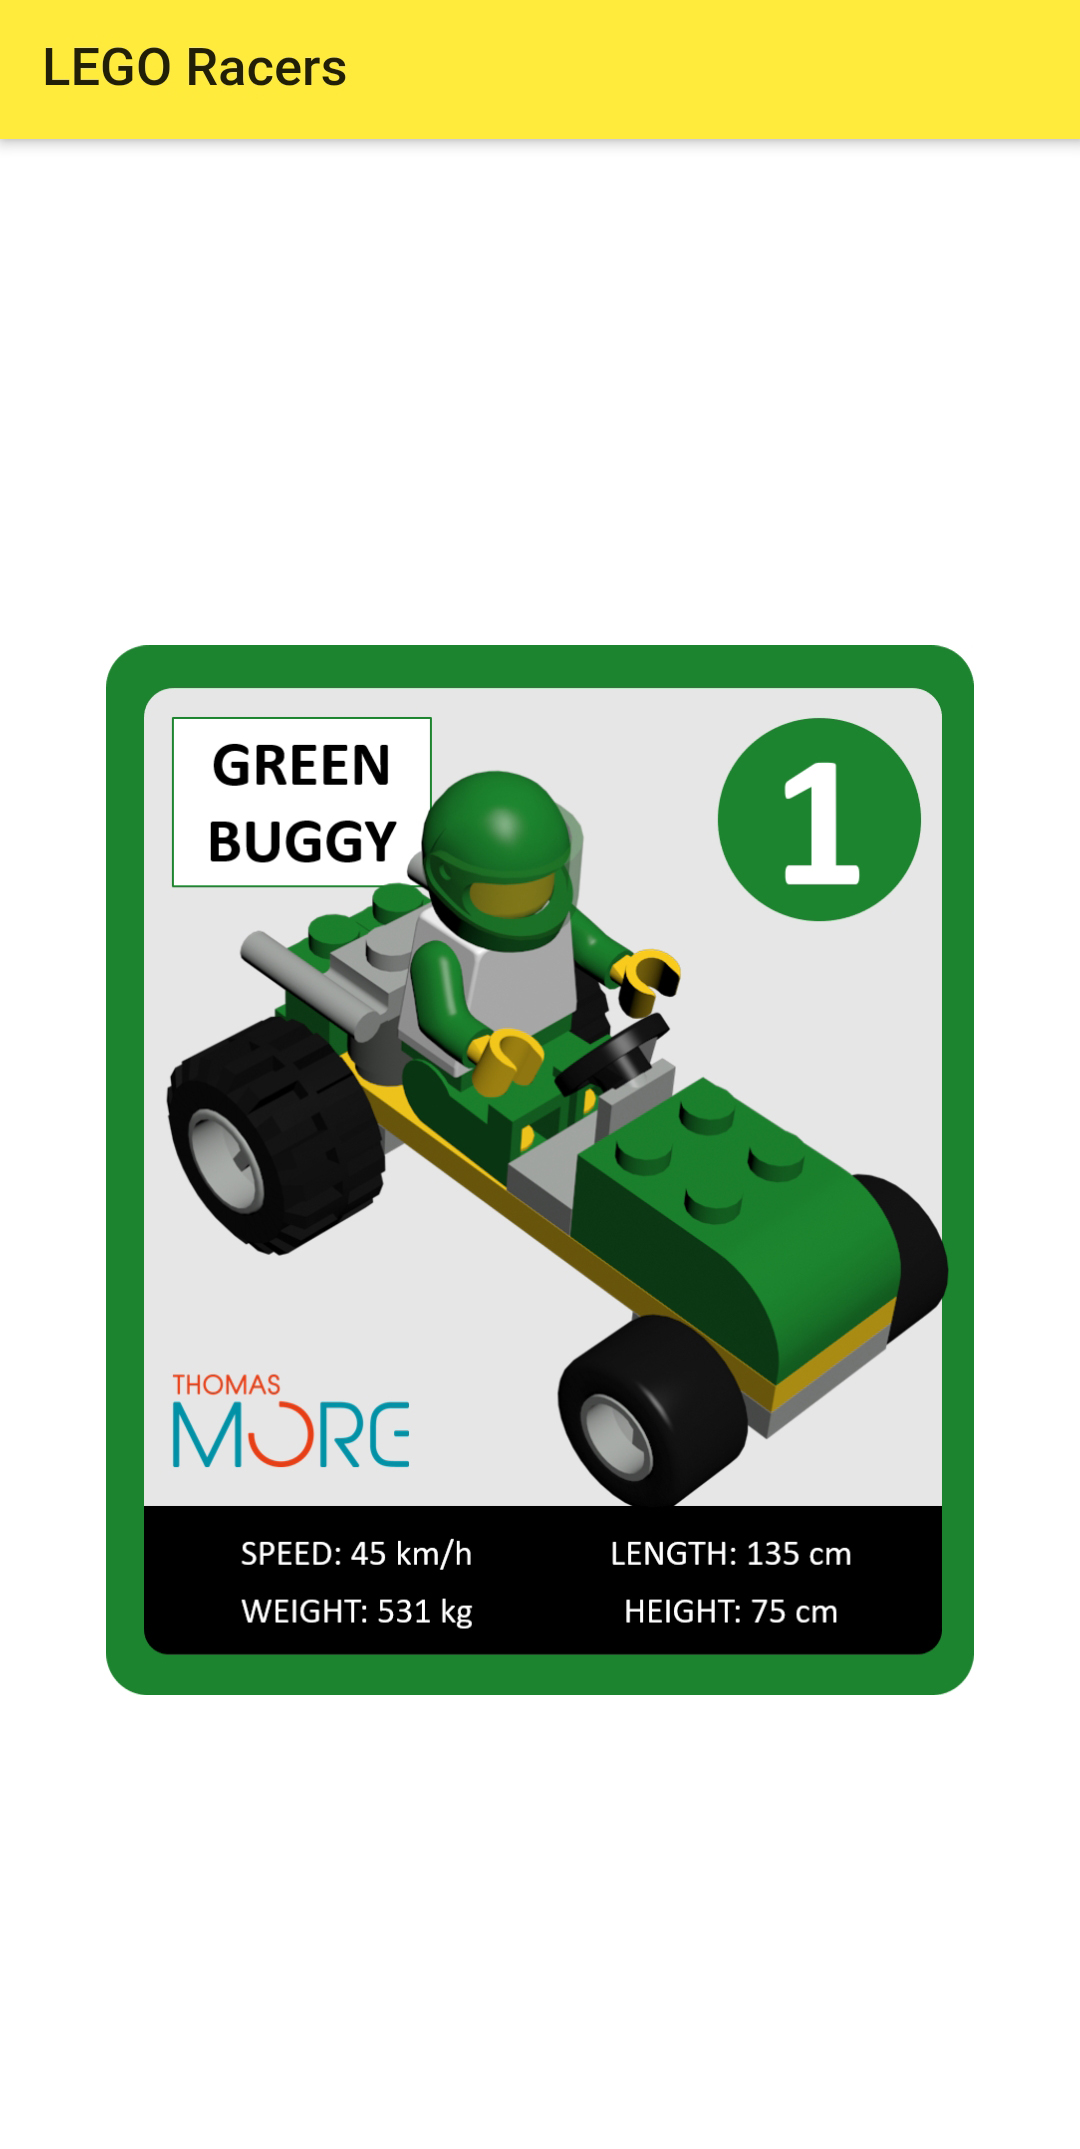
- In this section we'll put everything together and build a really cool LEGO Racers App.
- We'll explain some important 3D basics and use Property Animation.
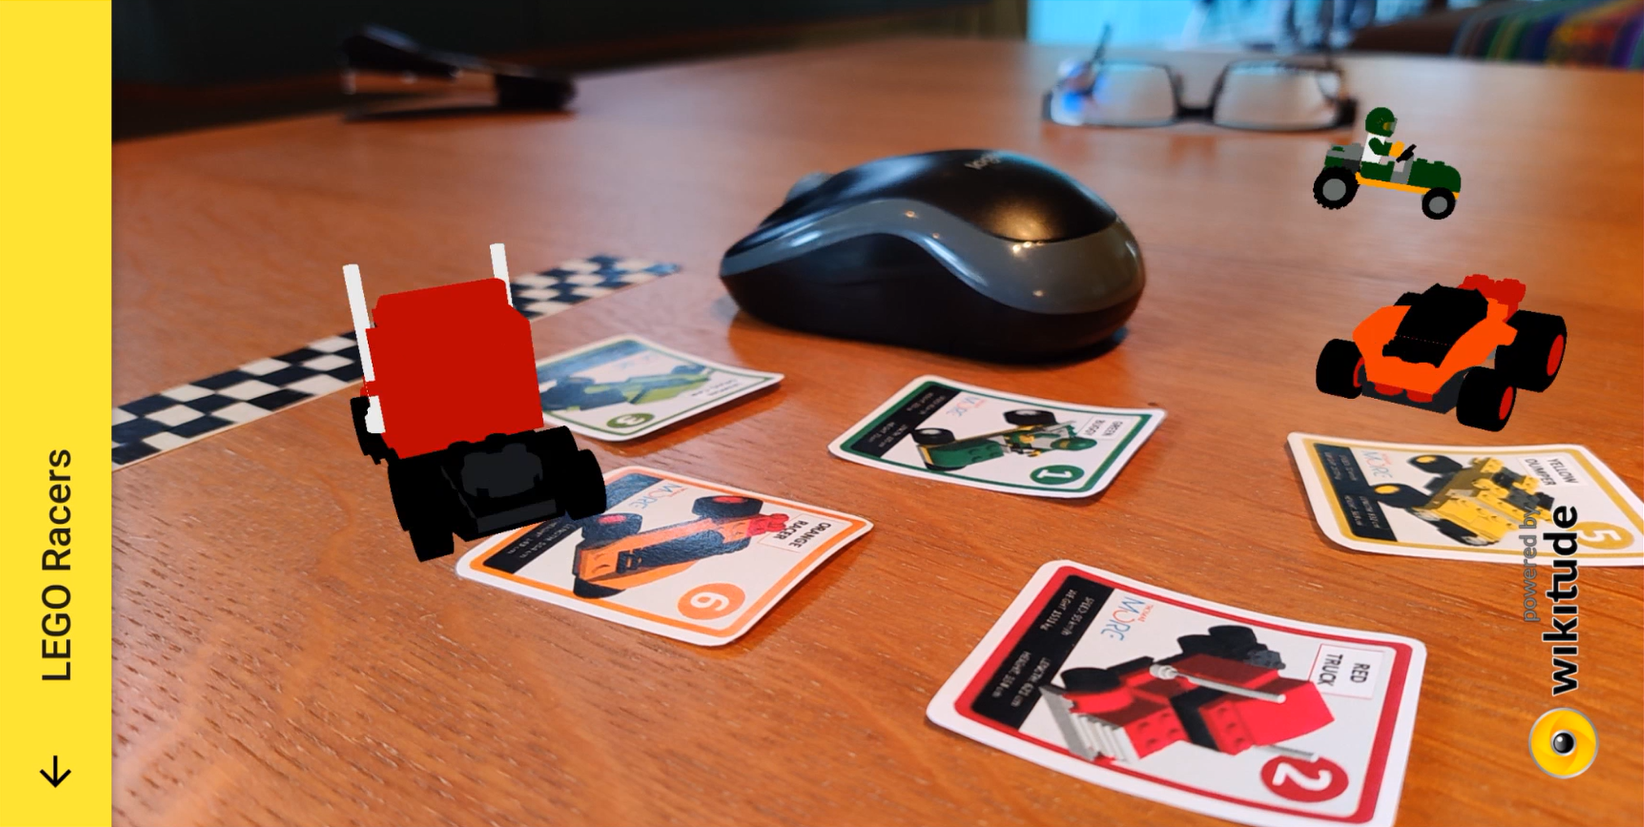
- Have a look at our facebook page to see the LEGO race cars in full action
# Using the Tools
MORE INFO
More information can be found in the Tools section.
# Convert the car models from .fbx to .wt3
- Download the fbx models and extract them
- Next use the Wikitude 3D Encoder to convert them to the
.wt3format - We'll use the models later in our project, but first let's have a look at the green buggy model in Wikitude 3D Encoder
- Models are created in a 3D world using an x-, y- and z-axis. You can see the model and the axes (in white color) below
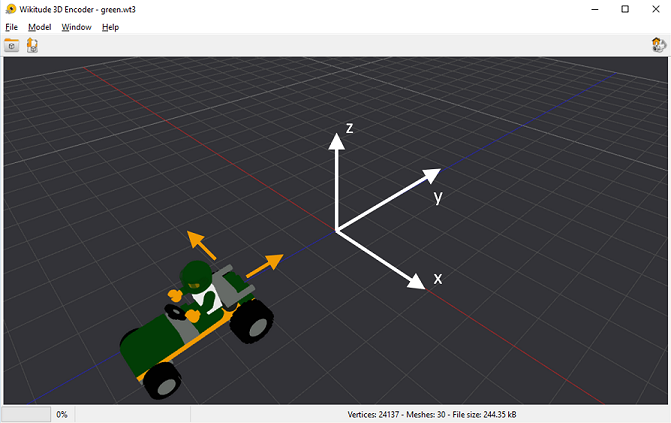
x-, y- and z-axis
As you can see, the designer didn't put the green buggy in the origin. Therefore when using the model later in our App, we have to move the buggy in the negative x-direction (a little bit to the left) and positive y-direction (backwards) (see yellow arrows). And if we want to rotate the buggy, we will use a rotation around the z-axis.
# Create a target collection
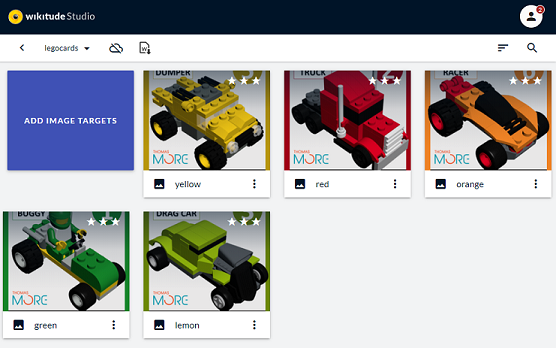
- Let's create a target collection that you can use to detect and track images within your ARchitect World
- Download the car cards and extract them
- Use Wikitude Studio to create a file
legocards.wtc
# Creating a Flutter/Wikitude App
MORE DETAIL
Following steps are explained in more detail in the Get started section. You can find more information there.
# Create the Flutter App
- Create a new Flutter app named lego_app
- Create the folders
pagesandwidgets - Delete
widget_test.dart - Copy the Wikitude SDK (
pluginfolder) and add the Wikitude plugin to the dependencies - Change the APP ID to
be.thomasmore.ar - Change the
minSdkVersionto 23 and thetargetSdkVersionto 30 - Add the right entries to the manifest file
# Add the pages and widget
- Replace the content of
main.dartwith
import 'package:flutter/material.dart';
import './pages/home.dart';
void main() {
runApp(const LegoApp());
}
class LegoApp extends StatelessWidget {
const LegoApp({Key? key}) : super(key: key);
// This widget is the root of your application.
Widget build(BuildContext context) {
return MaterialApp(
debugShowCheckedModeBanner: false,
title: 'LEGO App',
theme: ThemeData(
primarySwatch: Colors.yellow,
visualDensity: VisualDensity.adaptivePlatformDensity,
),
home: const HomePage(),
);
}
}
1
2
3
4
5
6
7
8
9
10
11
12
13
14
15
16
17
18
19
20
21
22
23
24
2
3
4
5
6
7
8
9
10
11
12
13
14
15
16
17
18
19
20
21
22
23
24
- Create a folder
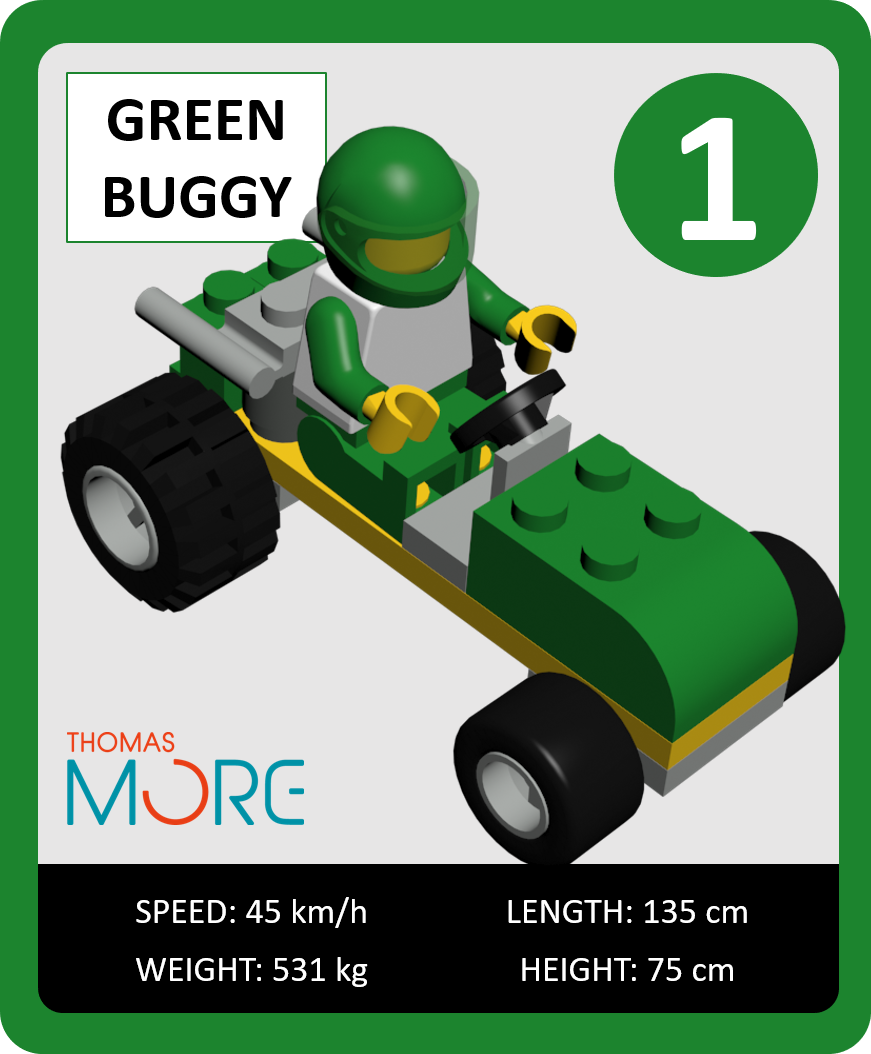
assetsin the root folder of you app. - Download this image of a LEGO buggy and copy it into the
assetsfolder. - Update your
pubspec.yamlwith the following asset:
# The following section is specific to Flutter.
flutter:

  # The following line ensures that the Material Icons font is
  # included with your application, so that you can use the icons in
  # the material Icons class.
  uses-material-design: true

  assets:
    - assets/green.png
1
2
3
4
5
6
7
8
9
10
2
3
4
5
6
7
8
9
10
- Create the page
home.dart(in thepagesfolder) with following code
import 'package:flutter/material.dart';
import 'wikitude.dart';
import 'package:augmented_reality_plugin_wikitude/wikitude_plugin.dart';
import 'package:augmented_reality_plugin_wikitude/wikitude_response.dart';
class HomePage extends StatefulWidget {
const HomePage({Key? key}) : super(key: key);
_HomePageState createState() => _HomePageState();
}
class _HomePageState extends State<HomePage> {
List<String> features = ["image_tracking"];
Widget build(BuildContext context) {
AssetImage asset = const AssetImage('assets/green.png');
Image image = Image(image: asset, width: 400.0, height: 400.0);
return Scaffold(
appBar: AppBar(
title: const Text("LEGO Racers"),
),
body: Container(
color: Colors.white,
child: Center(
child: GestureDetector(
onTap: () {
navigateToWikitude();
},
child: Container(
child: image,
padding: const EdgeInsets.only(top: 20.0),
),
),
),
),
);
}
void navigateToWikitude() {
checkDeviceCompatibility().then((value) => {
if (value.success)
{
requestARPermissions().then((value) => {
if (value.success)
{
Navigator.push(
context,
MaterialPageRoute(
builder: (context) => const WikitudePage()),
)
}
else
{
debugPrint("AR permissions denied"),
debugPrint(value.message)
}
})
}
else
{debugPrint("Device incompatible"), debugPrint(value.message)}
});
}
Future<WikitudeResponse> checkDeviceCompatibility() async {
return await WikitudePlugin.isDeviceSupporting(features);
}
Future<WikitudeResponse> requestARPermissions() async {
return await WikitudePlugin.requestARPermissions(features);
}
}
1
2
3
4
5
6
7
8
9
10
11
12
13
14
15
16
17
18
19
20
21
22
23
24
25
26
27
28
29
30
31
32
33
34
35
36
37
38
39
40
41
42
43
44
45
46
47
48
49
50
51
52
53
54
55
56
57
58
59
60
61
62
63
64
65
66
67
68
69
70
71
72
73
74
75
2
3
4
5
6
7
8
9
10
11
12
13
14
15
16
17
18
19
20
21
22
23
24
25
26
27
28
29
30
31
32
33
34
35
36
37
38
39
40
41
42
43
44
45
46
47
48
49
50
51
52
53
54
55
56
57
58
59
60
61
62
63
64
65
66
67
68
69
70
71
72
73
74
75
- Create the page
wikitude.dart(in thepagesfolder) with following code
import 'package:flutter/material.dart';
import '../widgets/arworld.dart';
class WikitudePage extends StatefulWidget {
const WikitudePage({Key? key}) : super(key: key);
_WikitudePageState createState() => _WikitudePageState();
}
class _WikitudePageState extends State<WikitudePage> {
Widget build(BuildContext context) {
return Scaffold(
appBar: AppBar(
title: const Text("LEGO Racers"),
),
body: const Center(
// Here we load the Widget with the LEGO Racers experience
child: ARWorldWidget()),
);
}
}
1
2
3
4
5
6
7
8
9
10
11
12
13
14
15
16
17
18
19
20
21
22
23
2
3
4
5
6
7
8
9
10
11
12
13
14
15
16
17
18
19
20
21
22
23
- Create the widget
arworld.dart(in thewidgetsfolder) with following code
import 'package:augmented_reality_plugin_wikitude/architect_widget.dart';
import 'package:augmented_reality_plugin_wikitude/startupConfiguration.dart';
import 'package:flutter/material.dart';
class ARWorldWidget extends StatefulWidget {
const ARWorldWidget ({Key? key}) : super(key: key);
_ARWorldWidgetState createState() =>
_ARWorldWidgetState();
}
class _ARWorldWidgetState extends State<ARWorldWidget>
with WidgetsBindingObserver {
late ArchitectWidget architectWidget;
String wikitudeTrialLicenseKey =
"Replace with the Wikitude EDU License Key from Canvas";
StartupConfiguration startupConfiguration = StartupConfiguration(
cameraPosition: CameraPosition.BACK,
cameraResolution: CameraResolution.AUTO);
List<String> features = ["image_tracking"];
void initState() {
super.initState();
WidgetsBinding.instance?.addObserver(this);
architectWidget = ArchitectWidget(
onArchitectWidgetCreated: onArchitectWidgetCreated,
licenseKey: wikitudeTrialLicenseKey,
startupConfiguration: startupConfiguration,
features: features,
);
}
Widget build(BuildContext context) {
return Container(
decoration: const BoxDecoration(color: Colors.black),
child: architectWidget, //ar widget
);
}
void didChangeAppLifecycleState(AppLifecycleState state) {
switch (state) {
case AppLifecycleState.paused:
architectWidget.pause();
break;
case AppLifecycleState.resumed:
architectWidget.resume();
break;
default:
}
}
void dispose() {
architectWidget.pause();
architectWidget.destroy();
WidgetsBinding.instance?.removeObserver(this);
super.dispose();
}
Future<void> onArchitectWidgetCreated() async {
architectWidget.load(
"wikitude/index.html",
onLoadSuccess,
onLoadFailed);
architectWidget.resume();
}
Future<void> onLoadSuccess() async {
debugPrint("Successfully loaded Architect World");
}
Future<void> onLoadFailed(String error) async {
debugPrint("Failed to load Architect World");
debugPrint(error);
}
}
1
2
3
4
5
6
7
8
9
10
11
12
13
14
15
16
17
18
19
20
21
22
23
24
25
26
27
28
29
30
31
32
33
34
35
36
37
38
39
40
41
42
43
44
45
46
47
48
49
50
51
52
53
54
55
56
57
58
59
60
61
62
63
64
65
66
67
68
69
70
71
72
73
74
75
76
77
78
79
80
81
82
83
2
3
4
5
6
7
8
9
10
11
12
13
14
15
16
17
18
19
20
21
22
23
24
25
26
27
28
29
30
31
32
33
34
35
36
37
38
39
40
41
42
43
44
45
46
47
48
49
50
51
52
53
54
55
56
57
58
59
60
61
62
63
64
65
66
67
68
69
70
71
72
73
74
75
76
77
78
79
80
81
82
83
Wikitude EDU License key
- Do not forget to insert the license key from Canvas in the code above!
# Add the HTML & JS code
- Download the LEGO Racers Wikitude code
- Extract the archive and copy the
wikitudefolder into the root folder of your LEGO Racers App - As you can see, the
.wt3models of the LEGO cars are already in themodelsfolder. Normally you should use your own 3D models. - Also the
legocards.wtcand the png's are already into theassetsfolder
- Update your
pubspec.yamlwith the following assets:
# The following section is specific to Flutter.
flutter:

  # The following line ensures that the Material Icons font is
  # included with your application, so that you can use the icons in
  # the material Icons class.
  uses-material-design: true

  assets:
    - assets/green.png
    - wikitude/
    - wikitude/js/
    - wikitude/css/
    - wikitude/assets/
    - wikitude/assets/models/
1
2
3
4
5
6
7
8
9
10
11
12
13
14
15
2
3
4
5
6
7
8
9
10
11
12
13
14
15
# Gradle version
- Change the Gradle version to a lower one (3.6.0) in the
android\build.gradlefile - Remove the
abiFiltersin theandroid\app\build.gradlefile (if it's there)
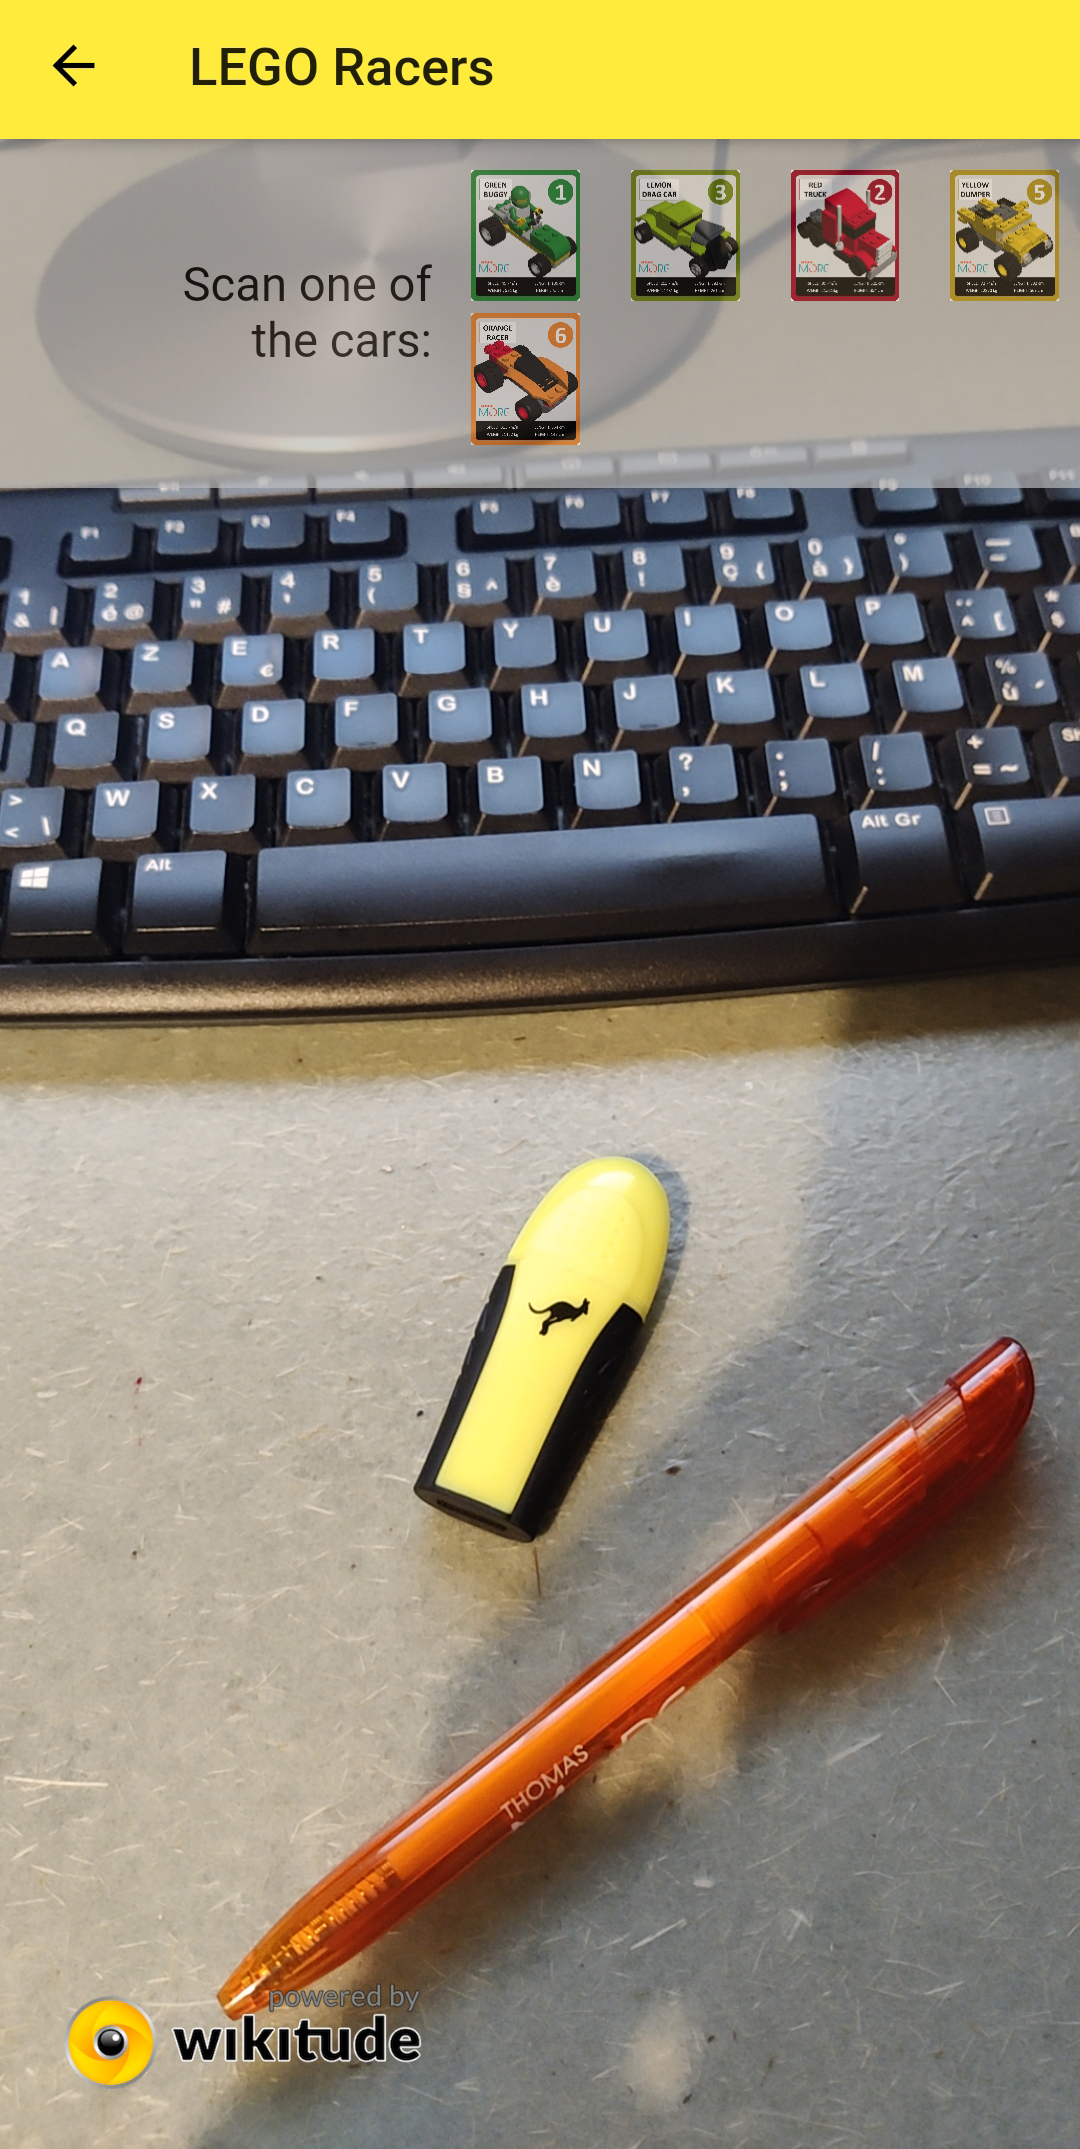
# Run the App
- Download the LEGO Racers cards. Print and cut out the cards.
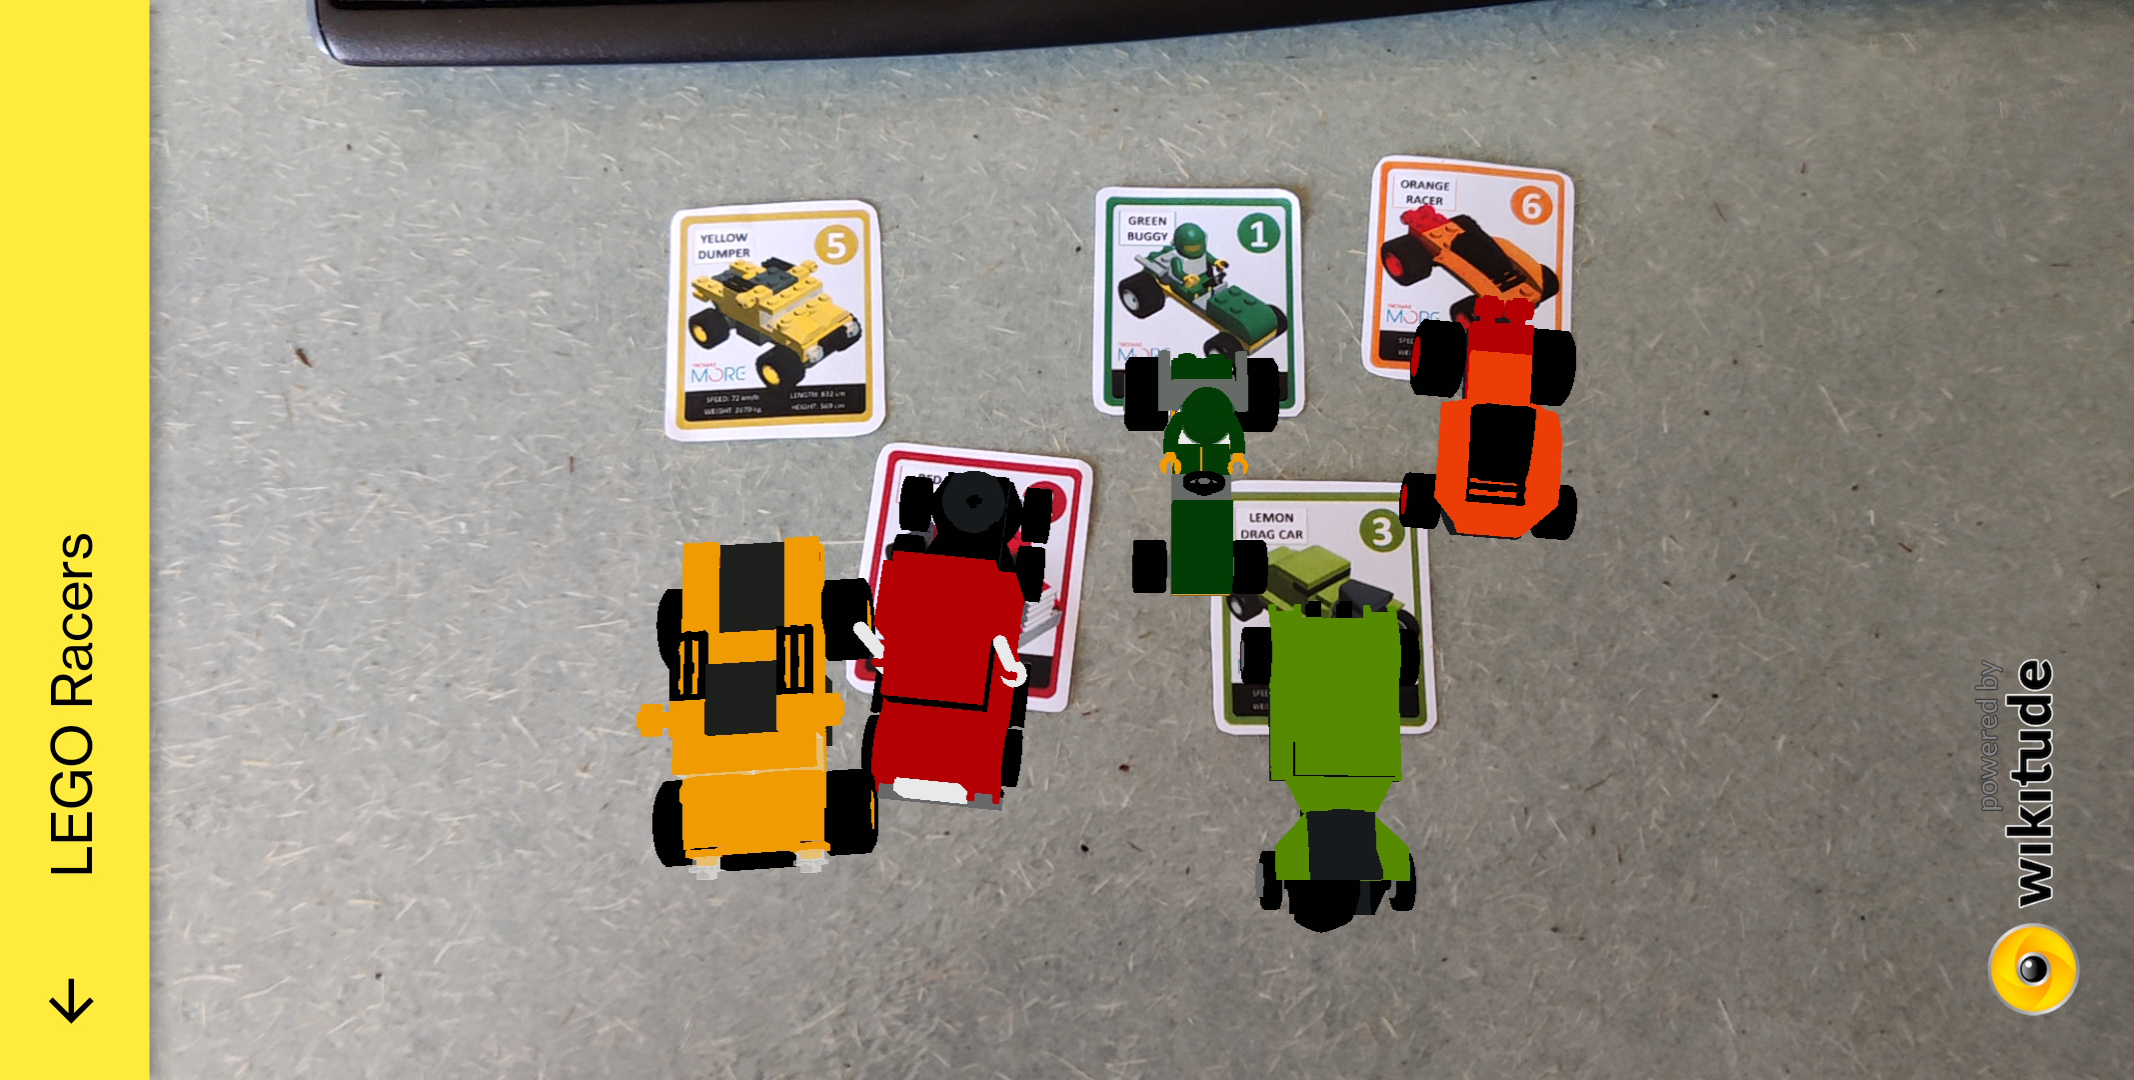
- Run the App and try it out.
# Adding Property Animation
# 3D Basics
- Before we add the Property Animation, let's explain some 3D basics
- Open
multiplesimultaneoustargets.jsin thewikitudefolder. The use of the.wtcand.wt3files is already explained in the Tools section of this course. Now we'll concentrate on the 3D part - There are five models (or cars) and every model has four properties that are initialized in the beginning of the code. If necessary, you can create your own properties as well. We'll explain the properties in a moment.
    carSettings: {
        lemon: {
            scale: 0.4,
            translateX: 0,
            translateY: 0,
            time: 2000,
        },
        green: {
            scale: 0.4,
            translateX: -0.22,
            translateY: 1.7,
            time: 2500,
        },
        ...
    },
1
2
3
4
5
6
7
8
9
10
11
12
13
14
15
2
3
4
5
6
7
8
9
10
11
12
13
14
15
- The properties are used when creating the 3D model based on which target was recognized
    onImageRecognized: function(target) {
        /*
            Create 3D model based on which target was recognized.
        */
        var model = new AR.Model("assets/models/" + target.name + ".wt3", {
            translate: {
                x: World.carSettings[target.name].translateX,
                y: World.carSettings[target.name].translateY,
            },
            scale: World.carSettings[target.name].scale,
            rotate: {
                z: 0,
            },
            onError: World.onError
        });

        /* Adds the model as augmentation for the currently recognized target. */
        this.addImageTargetCamDrawables(target, model);

        World.hideInfoBar();
    },
1
2
3
4
5
6
7
8
9
10
11
12
13
14
15
16
17
18
19
20
21
2
3
4
5
6
7
8
9
10
11
12
13
14
15
16
17
18
19
20
21
- Let's show the coordinate system of our green buggy once again
# TRANSLATE
- We already know that the designer didn't put the green buggy in the origin. If we want the buggy in the middle of the card (the origin of our AR scene), we need to move the buggy in the negative x-direction (a little bit to the left) and positive y-direction (backwards) (see yellow arrows).
- And that's exactly what we've specified in the
translateXandtranslateYproperties of our green buggy model
        green: {
            scale: 0.4,
            translateX: -0.22,
            translateY: 1.7,
            time: 2500,
        },
        ...
    },
1
2
3
4
5
6
7
8
2
3
4
5
6
7
8
# SCALE
- When you use models from different designers, not every model will be at the same size. The mice model of designer A could be bigger then the tree model of designer B, which of course makes no sence if you would use them in the same AR scene. Normally mices are smaller than trees.
- You can use the
scaleproperty in order to achieve the correct size proportions
# ROTATE
- You can rotate your model using the three axes (using a value between 0° and 360°).
# Exercise
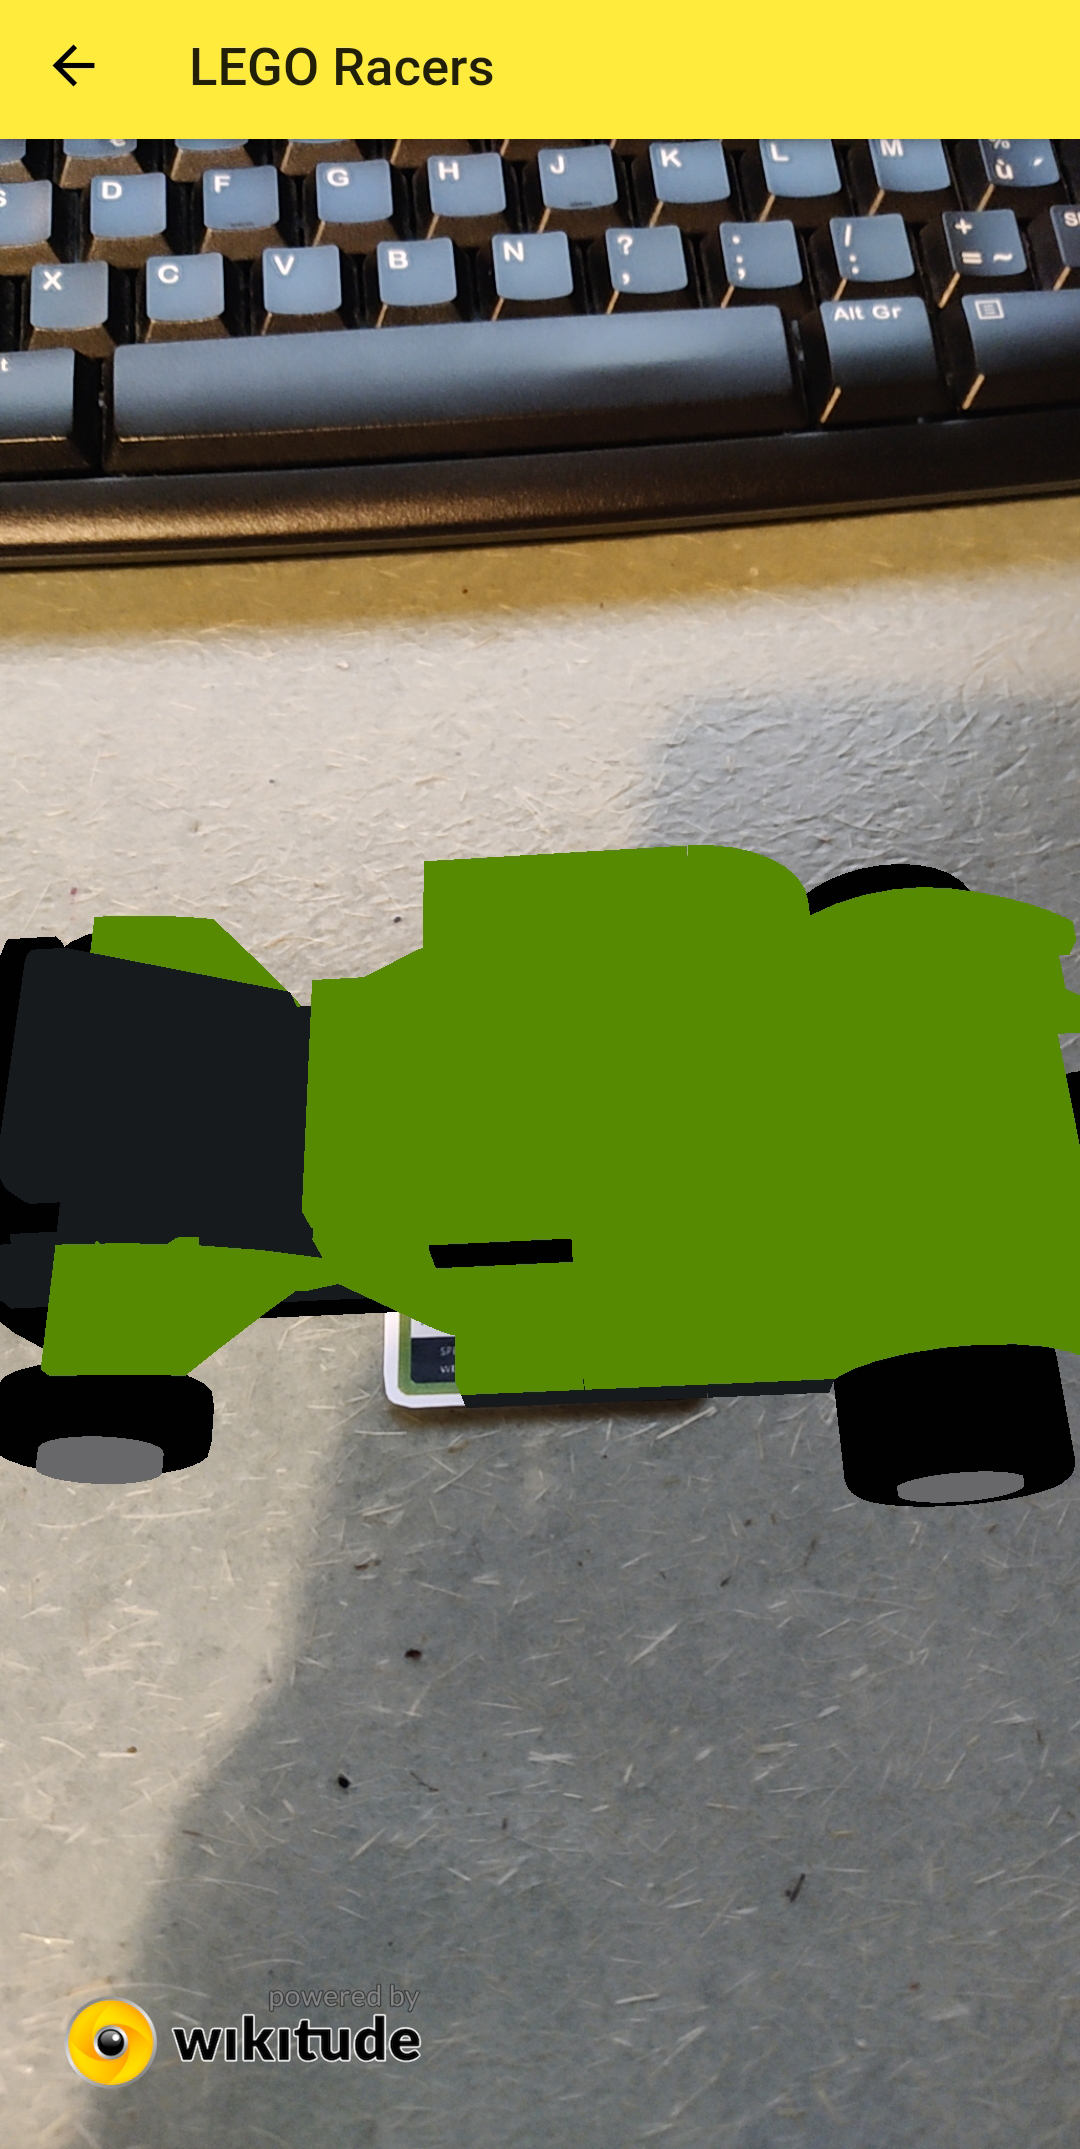
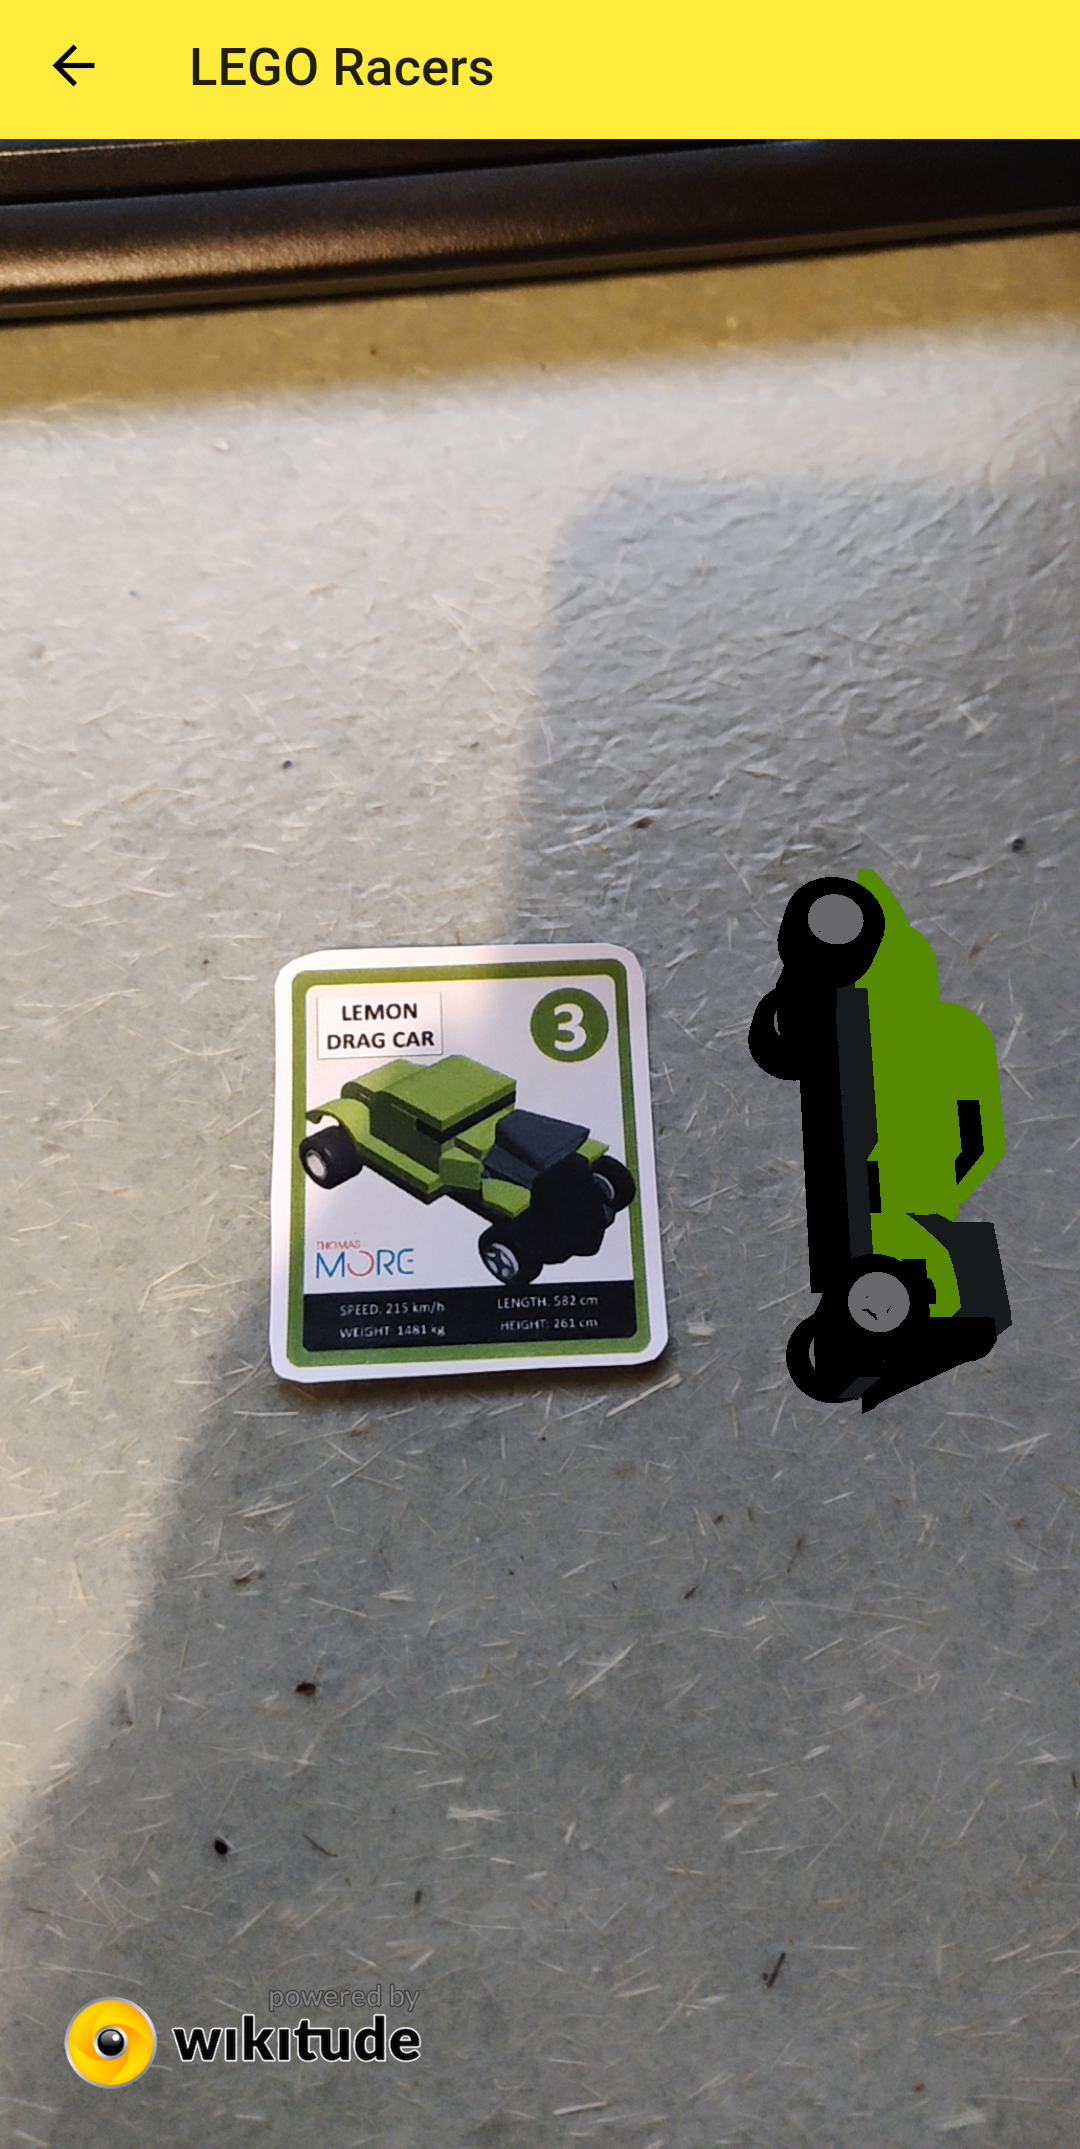
- Use the lemon drag racer card and try to create these AR scenes


# Bring the 3D scene to life
# DRIVE FORWARD AND BACKWARD
- Undo all the modifications you've made
- Add the function
animateto yourWorldobject
    animate: function(car, offsetX, offsetY, time) {
        var distance = 2;

        var forward = new AR.PropertyAnimation(car, 'translate.y', offsetY, offsetY  + distance * -1.5, time);
        var backward = new AR.PropertyAnimation(car, 'translate.y', offsetY  + distance * -1.5, offsetY, time);

        var animationGroup = new AR.AnimationGroup(AR.CONST.ANIMATION_GROUP_TYPE.SEQUENTIAL, [forward, backward]);

        animationGroup.start(-1);
    },
1
2
3
4
5
6
7
8
9
10
2
3
4
5
6
7
8
9
10
| code | description |
|---|---|
new AR.PropertyAnimation(car | Add an animation to the car model |
'translate.y' | The property you want to animate |
offsetY | Start value |
offsetY + distance * -1.5 | End value |
time | duration of the animation (in milliseconds) |
new AR.AnimationGroup(AR.CONST.ANIMATION_GROUP_TYPE.SEQUENTIAL, | Create a new animationgroup which is a sequential combination of |
[forward, backward] | driving forward and driving backward |
animationGroup.start(-1); | Repeat this animation infinitely |
- Call the animate function
    this.addImageTargetCamDrawables(target, model);

    setTimeout(function() { World.animate(model, World.carSettings[target.name].translateX, World.carSettings[target.name].translateY, World.carSettings[target.name].time); }, 2000);

    World.hideInfoBar();
1
2
3
4
5
2
3
4
5
| code | description |
|---|---|
setTimeout(function() { World.animate(model, ...); }, 2000); | Wait for two seconds and then add the animation to the model |
- See what happens
- Of course, you can animate the other properties (translate.x, rotate.z, scale, ...) as well
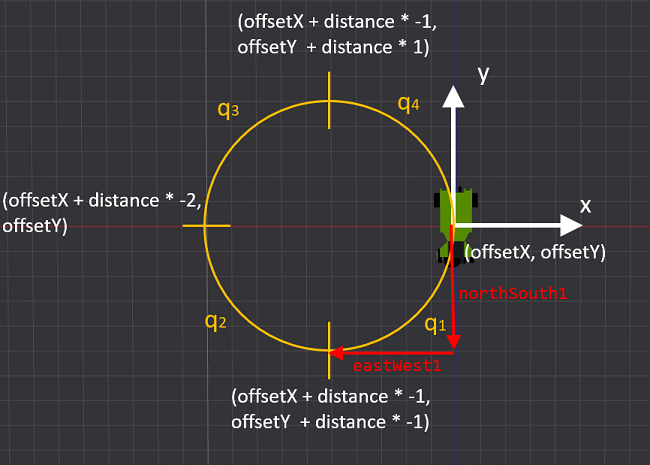
# DRIVE IN CIRCLES
- Replace the
animatefunction with
    animate: function(car, offsetX, offsetY, roundingTime) {
        var distance = 2;

        var northSouth1 = new AR.PropertyAnimation(car, 'translate.y', offsetY, offsetY  + distance * -1, roundingTime, {
            type: AR.CONST.EASING_CURVE_TYPE.EASE_OUT_SINE
        });
        var eastWest1 = new AR.PropertyAnimation(car, 'translate.x', offsetX, offsetX + distance * -1, roundingTime, {
            type: AR.CONST.EASING_CURVE_TYPE.EASE_IN_SINE
        });

        var northSouth2 = new AR.PropertyAnimation(car, 'translate.y', offsetY  + distance * -1, offsetY, roundingTime, {
            type: AR.CONST.EASING_CURVE_TYPE.EASE_IN_SINE
        });
        var eastWest2 = new AR.PropertyAnimation(car, 'translate.x', offsetX + distance * -1, offsetX + distance * -2, roundingTime, {
            type: AR.CONST.EASING_CURVE_TYPE.EASE_OUT_SINE
        });

        var northSouth3 = new AR.PropertyAnimation(car, 'translate.y', offsetY, offsetY  + distance * 1, roundingTime, {
            type: AR.CONST.EASING_CURVE_TYPE.EASE_OUT_SINE
        });
        var eastWest3 = new AR.PropertyAnimation(car, 'translate.x', offsetX + distance * -2, offsetX + distance * -1, roundingTime, {
            type: AR.CONST.EASING_CURVE_TYPE.EASE_IN_SINE
        });

        var northSouth4 = new AR.PropertyAnimation(car, 'translate.y', offsetY  + distance * 1, offsetY, roundingTime, {
            type: AR.CONST.EASING_CURVE_TYPE.EASE_IN_SINE
        });
        var eastWest4 = new AR.PropertyAnimation(car, 'translate.x', offsetX + distance * -1, offsetX, roundingTime, {
            type: AR.CONST.EASING_CURVE_TYPE.EASE_OUT_SINE
        });

        var q1 = new AR.AnimationGroup(AR.CONST.ANIMATION_GROUP_TYPE.PARALLEL, [northSouth1, eastWest1]);
        var q2 = new AR.AnimationGroup(AR.CONST.ANIMATION_GROUP_TYPE.PARALLEL, [northSouth2, eastWest2]);
        var q3 = new AR.AnimationGroup(AR.CONST.ANIMATION_GROUP_TYPE.PARALLEL, [northSouth3, eastWest3]);
        var q4 = new AR.AnimationGroup(AR.CONST.ANIMATION_GROUP_TYPE.PARALLEL, [northSouth4, eastWest4]);

        var cicularAnimationGroup = new AR.AnimationGroup(AR.CONST.ANIMATION_GROUP_TYPE.SEQUENTIAL, [q1, q2, q3, q4]);

        cicularAnimationGroup.start(-1);
    },
1
2
3
4
5
6
7
8
9
10
11
12
13
14
15
16
17
18
19
20
21
22
23
24
25
26
27
28
29
30
31
32
33
34
35
36
37
38
39
40
2
3
4
5
6
7
8
9
10
11
12
13
14
15
16
17
18
19
20
21
22
23
24
25
26
27
28
29
30
31
32
33
34
35
36
37
38
39
40
- Run your App and see what happens
- This function is a little bit difficult to explain in text. But because a picture is worth a thousand words, hopefully the image below will clarify things out
REMARK
- Have you noticed that it is possible to combine multiple animations: PARALLEL or SEQUENTIAL!
- You can also define a smooth curve using EASE_OUT_SINE and EASE_IN_SINE! More info can be found here
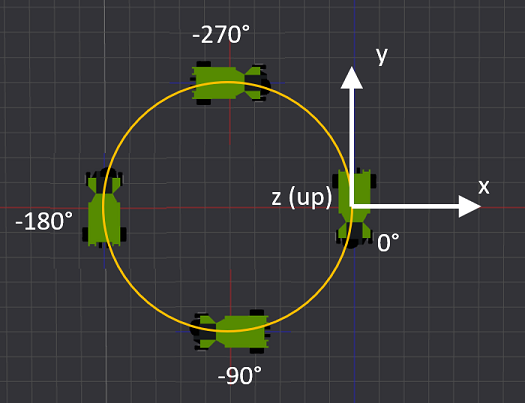
# DRIVE IN CIRCLES AND ROTATE AT THE SAME TIME
- Our cars already drive in circles but the direction of our cars is a little weird (always in the South direction)
- Let's try to rotate our car in the right direction while driving
- Use this
animatefunction
    animate: function(car, offsetX, offsetY, roundingTime) {
        var distance = 3;

        var northSouth1 = new AR.PropertyAnimation(car, 'translate.y', offsetY, offsetY  + distance * -1, roundingTime, {
            type: AR.CONST.EASING_CURVE_TYPE.EASE_OUT_SINE
        });
        var eastWest1 = new AR.PropertyAnimation(car, 'translate.x', offsetX, offsetX + distance * -1, roundingTime, {
            type: AR.CONST.EASING_CURVE_TYPE.EASE_IN_SINE
        });
        var rotate1 = new AR.PropertyAnimation(car, 'rotate.z', 0, -90, roundingTime);

        var northSouth2 = new AR.PropertyAnimation(car, 'translate.y', offsetY  + distance * -1, offsetY, roundingTime, {
            type: AR.CONST.EASING_CURVE_TYPE.EASE_IN_SINE
        });
        var eastWest2 = new AR.PropertyAnimation(car, 'translate.x', offsetX + distance * -1, offsetX + distance * -2, roundingTime, {
            type: AR.CONST.EASING_CURVE_TYPE.EASE_OUT_SINE
        });
        var rotate2 = new AR.PropertyAnimation(car, 'rotate.z', -90, -180, roundingTime);

        var northSouth3 = new AR.PropertyAnimation(car, 'translate.y', offsetY, offsetY  + distance * 1, roundingTime, {
            type: AR.CONST.EASING_CURVE_TYPE.EASE_OUT_SINE
        });
        var eastWest3 = new AR.PropertyAnimation(car, 'translate.x', offsetX + distance * -2, offsetX + distance * -1, roundingTime, {
            type: AR.CONST.EASING_CURVE_TYPE.EASE_IN_SINE
        });
        var rotate3 = new AR.PropertyAnimation(car, 'rotate.z', -180, -270, roundingTime);

        var northSouth4 = new AR.PropertyAnimation(car, 'translate.y', offsetY  + distance * 1, offsetY, roundingTime, {
            type: AR.CONST.EASING_CURVE_TYPE.EASE_IN_SINE
        });
        var eastWest4 = new AR.PropertyAnimation(car, 'translate.x', offsetX + distance * -1, offsetX, roundingTime, {
            type: AR.CONST.EASING_CURVE_TYPE.EASE_OUT_SINE
        });
        var rotate4 = new AR.PropertyAnimation(car, 'rotate.z', -270, -360, roundingTime);

        var q1 = new AR.AnimationGroup(AR.CONST.ANIMATION_GROUP_TYPE.PARALLEL, [northSouth1, eastWest1, rotate1]);
        var q2 = new AR.AnimationGroup(AR.CONST.ANIMATION_GROUP_TYPE.PARALLEL, [northSouth2, eastWest2, rotate2]);
        var q3 = new AR.AnimationGroup(AR.CONST.ANIMATION_GROUP_TYPE.PARALLEL, [northSouth3, eastWest3, rotate3]);
        var q4 = new AR.AnimationGroup(AR.CONST.ANIMATION_GROUP_TYPE.PARALLEL, [northSouth4, eastWest4, rotate4]);

        var cicularAnimationGroup = new AR.AnimationGroup(AR.CONST.ANIMATION_GROUP_TYPE.SEQUENTIAL, [q1, q2, q3, q4]);

        cicularAnimationGroup.start(-1);
    },
1
2
3
4
5
6
7
8
9
10
11
12
13
14
15
16
17
18
19
20
21
22
23
24
25
26
27
28
29
30
31
32
33
34
35
36
37
38
39
40
41
42
43
44
2
3
4
5
6
7
8
9
10
11
12
13
14
15
16
17
18
19
20
21
22
23
24
25
26
27
28
29
30
31
32
33
34
35
36
37
38
39
40
41
42
43
44
- Let's use an image again to explain the rotation of the car
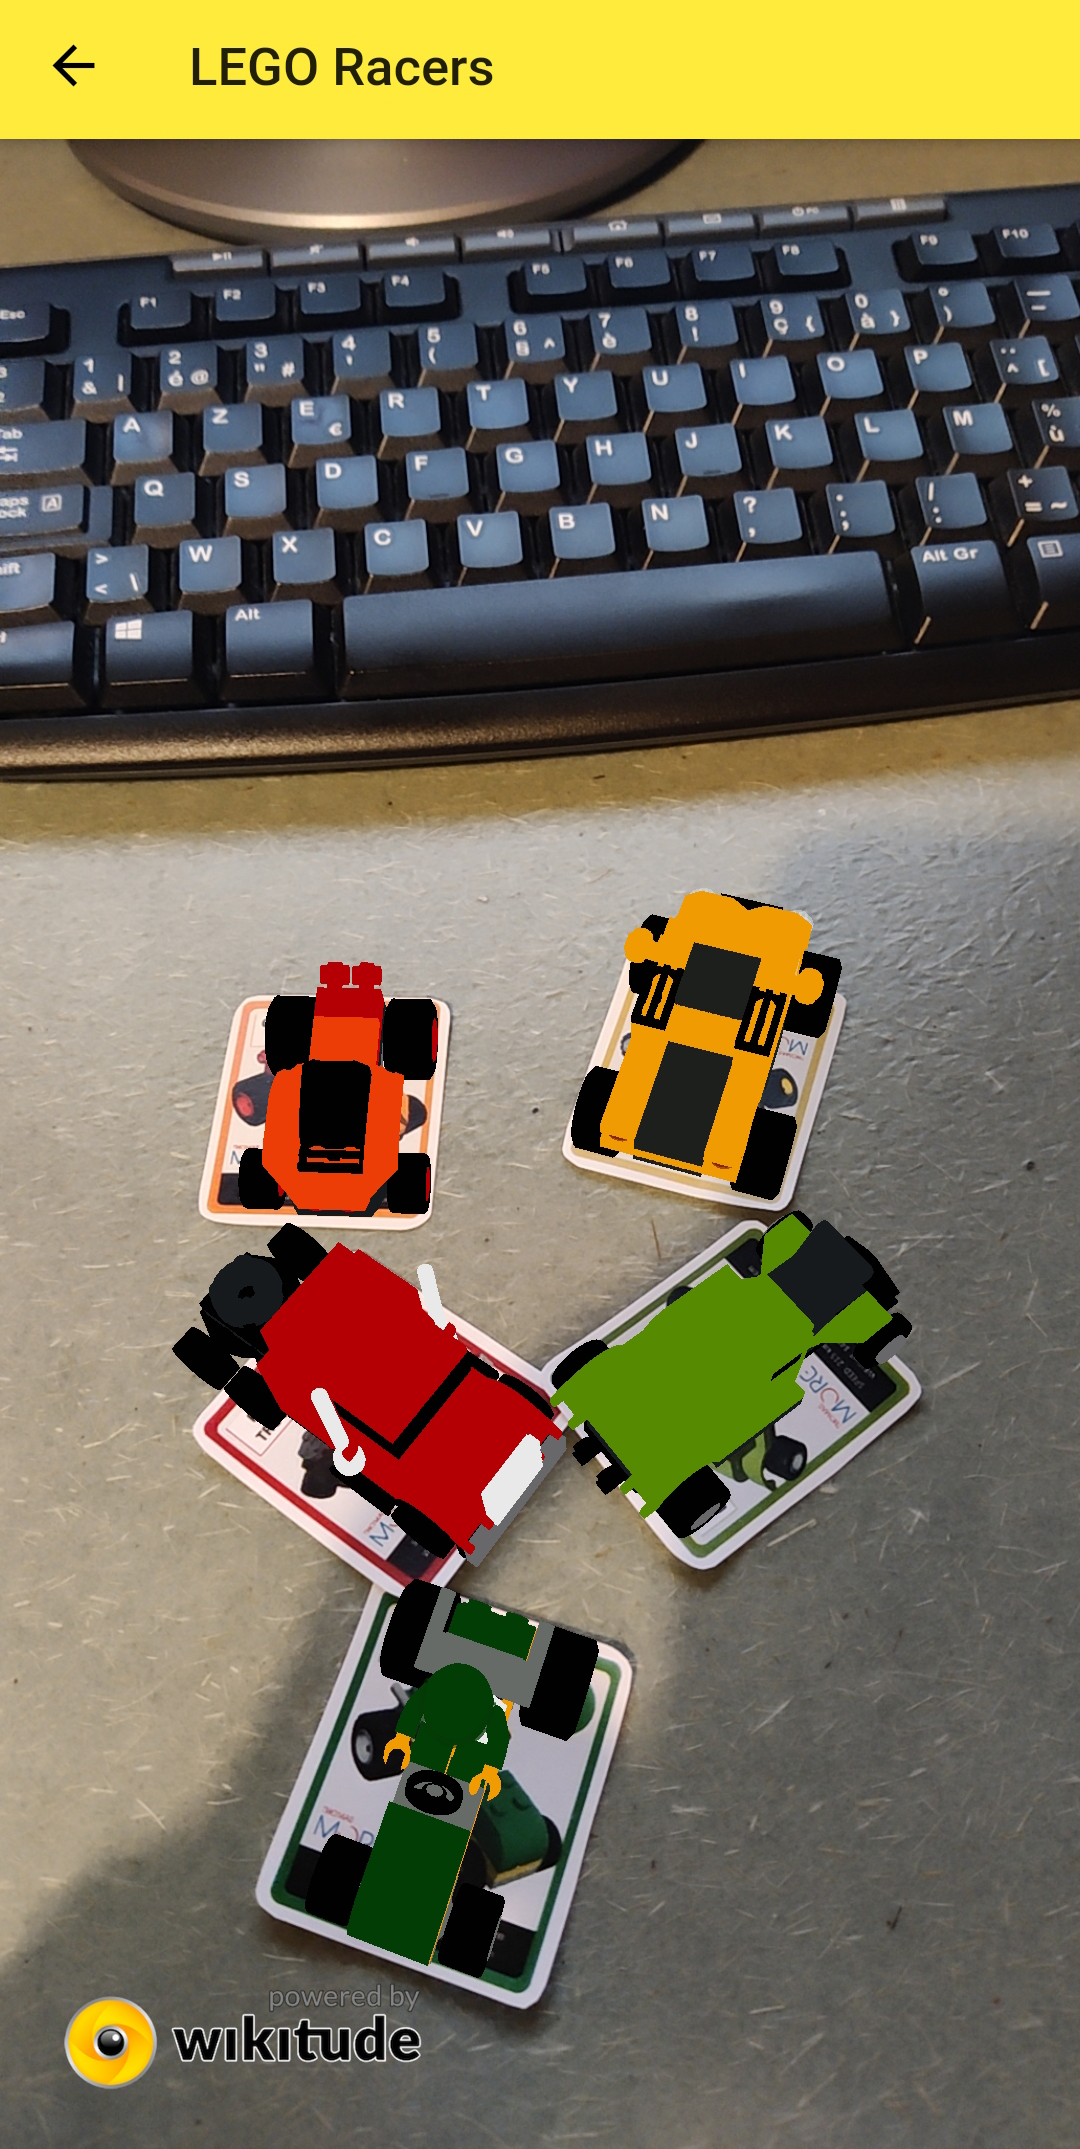
- Run the App and watch the cars chasing each other on your desk
- You might see that some of the cars are rotating a little bit strange, they are drifting like Mario Kart. Because the models are not positioned exactly in the middle by the designer, the rotation point is also not in the center of the car. That's why.
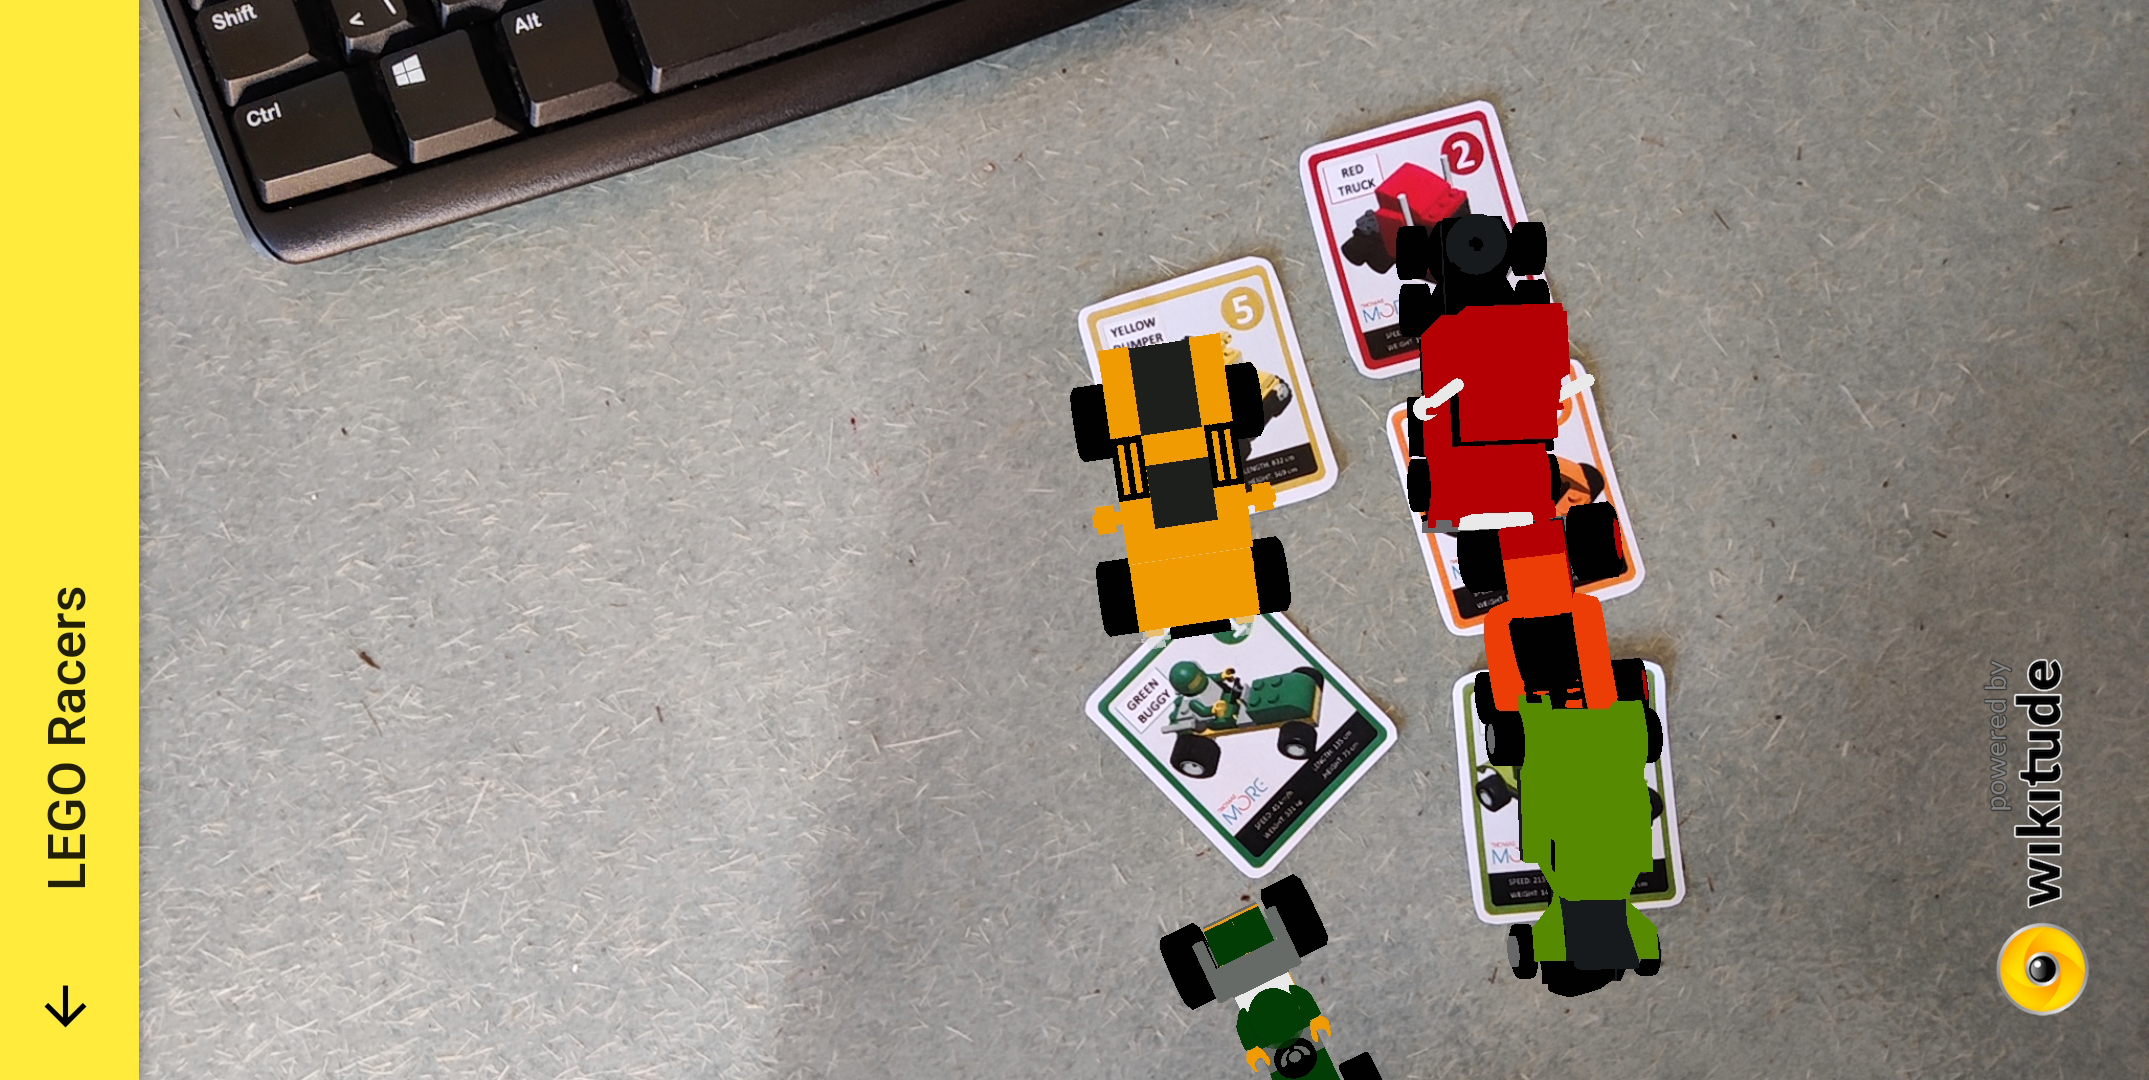
- Maybe you can try to modify the code and make the cars follow a different path