Basics
Basics
Panels
First, let's give a brief overview of the different panels in Unity.
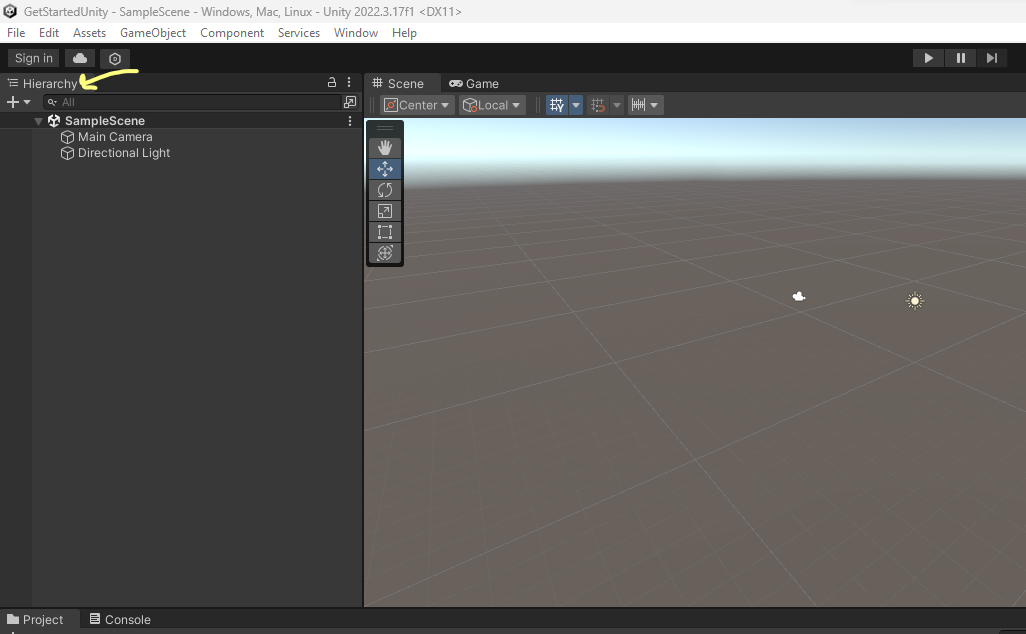
Hierarchy Panel
List of all 2D and 3D objects in your Unity project.
- 3D objects in Unity are commonly referred to as game objects
- 2D objects are called sprites
By default we get:
- Main Camera, which is the viewpoint through which the game world is rendered to the screen
- Directional Light, which simulates sunlight, so it can illuminate a whole scene
Scene panel
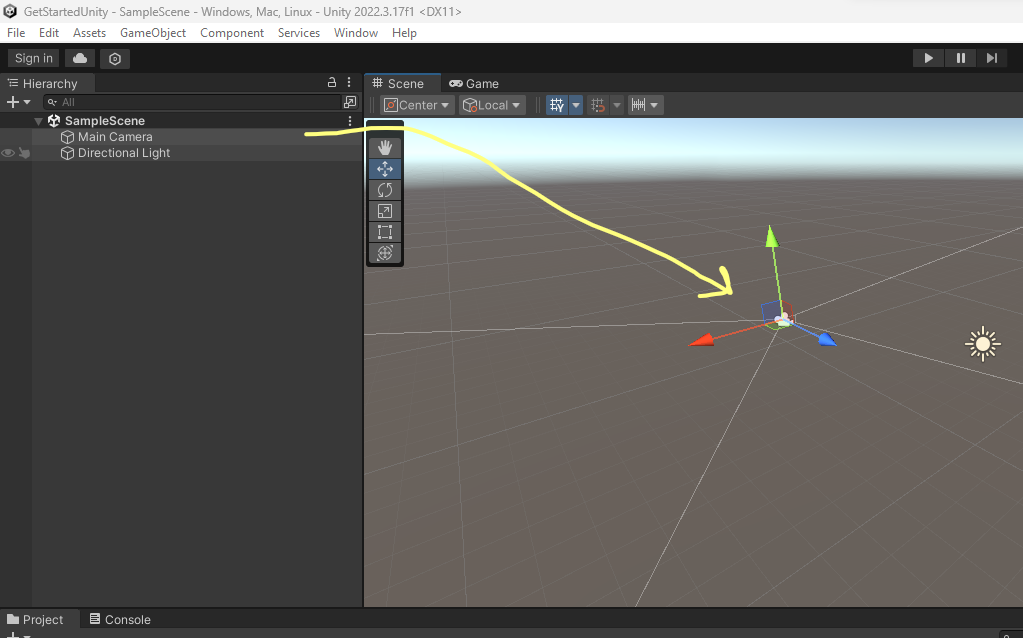
The most important panel in Unity! In the scene panel we can view, position, rotate and scale game objects. Select a game object in the hierarchy panel to show it in the scene panel.
Scene navigation
- You can change the view in the Scene panel by using the Hand tool for panning.
- Zooming in and out using the mouse scroll wheel.
- Pressing the Alt key and dragging the mouse allows you to orbit around the scene view, providing a different perspective of the scene.
- In the upper right corner of the Scene panel, you typically see the XYZ axes indicators. These indicators show the orientation of the axes in the scene. You can press one of the axis to look at the scene from that angle, i.e. if you press Y, you look at the scene from above.
- If you lose your orientation after all these panning, rotating, and zooming, you can always restore the original view by closing the scene panel (Right click|Close tab) and then opening it again (3 dots upper right|Add tab).
Game panel
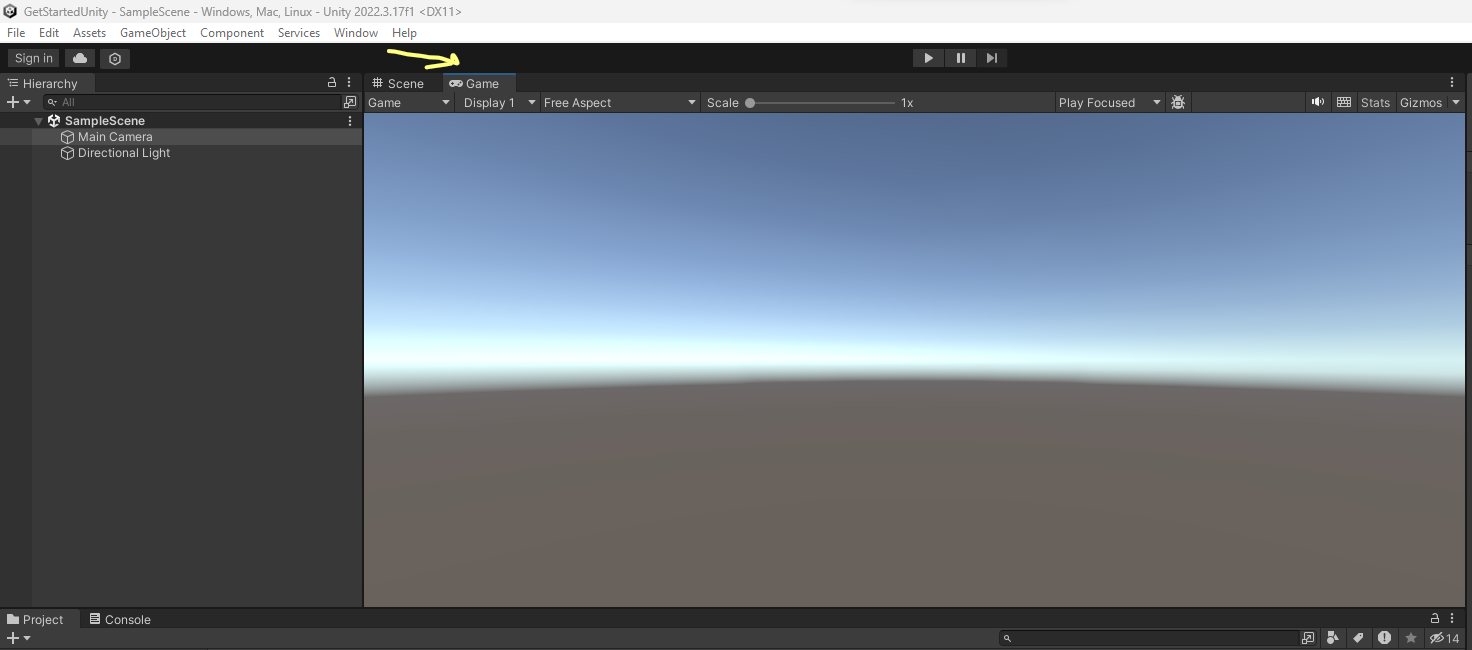
Inside the game panel we can preview the output of our game/application.
Inspector panel
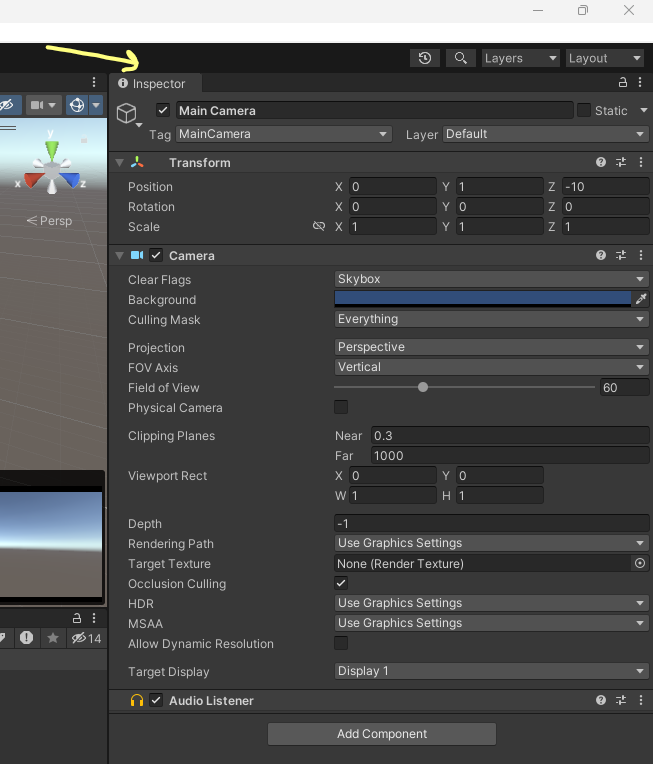
In the inspector panel we can view the properties of a selected game object. In the following screenshot the Main Camera game object is selected.
Project panel
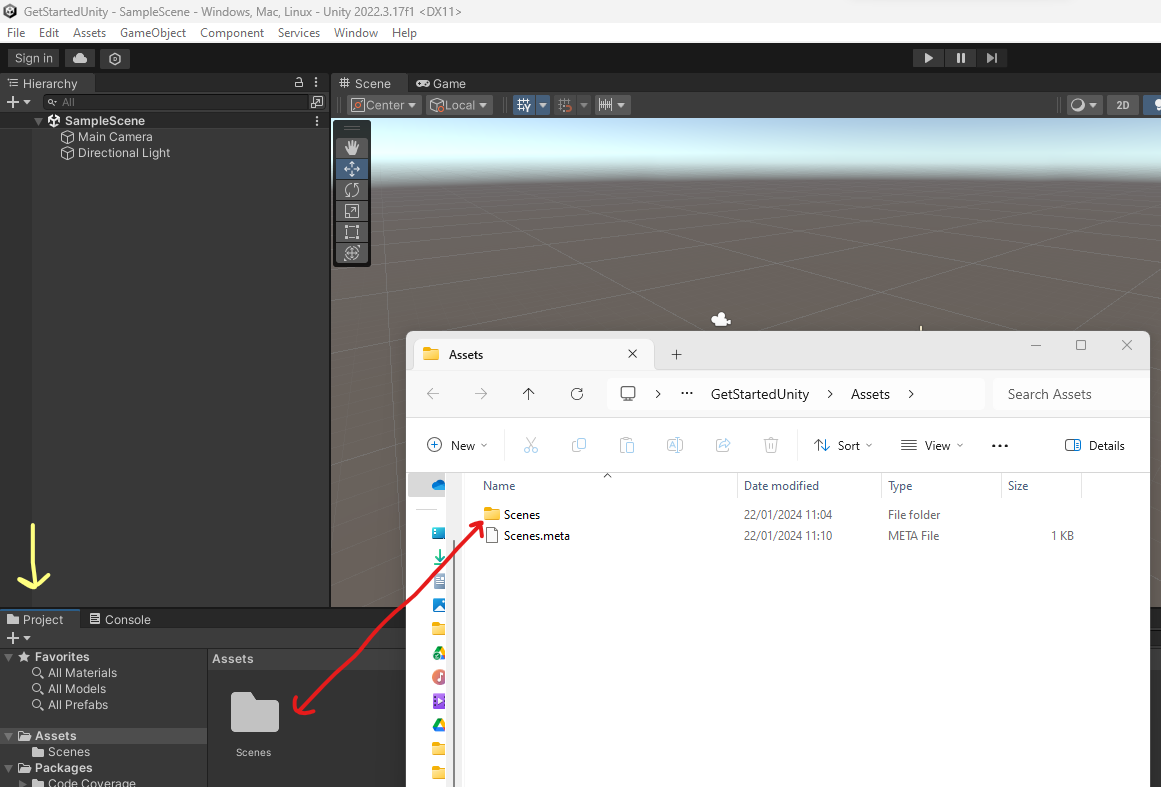
The project panel contains all files/folders associated with your project. By default there is an Assets folder which contains a Scenes folder.
Info
- As Unity is primarly developed as a game engine, scenes in Unity are basically like levels of a game.
- When creating an application, there is a scene for each page
Console panel
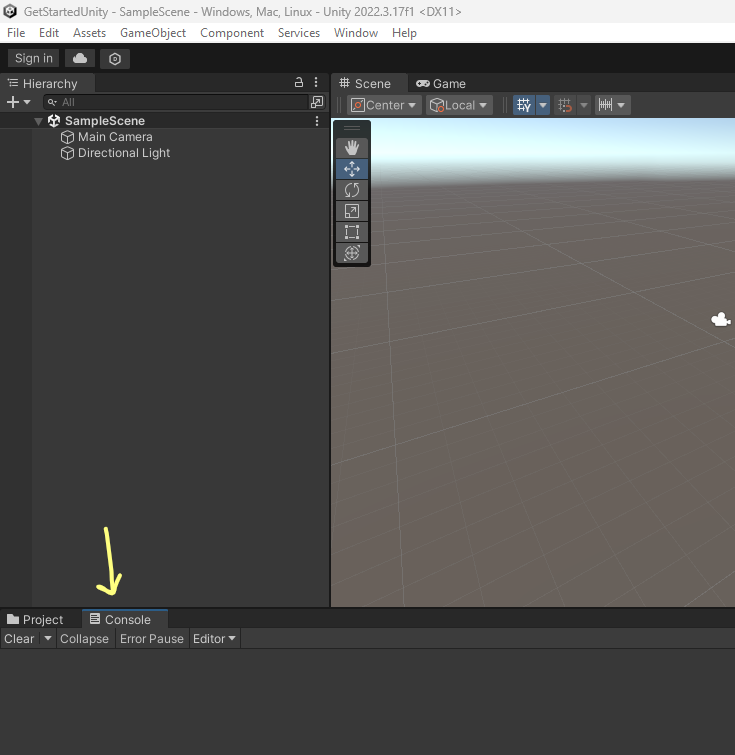
If there are errors or warnings during development/compilation they are displayed in the console panel.
Creating a game object
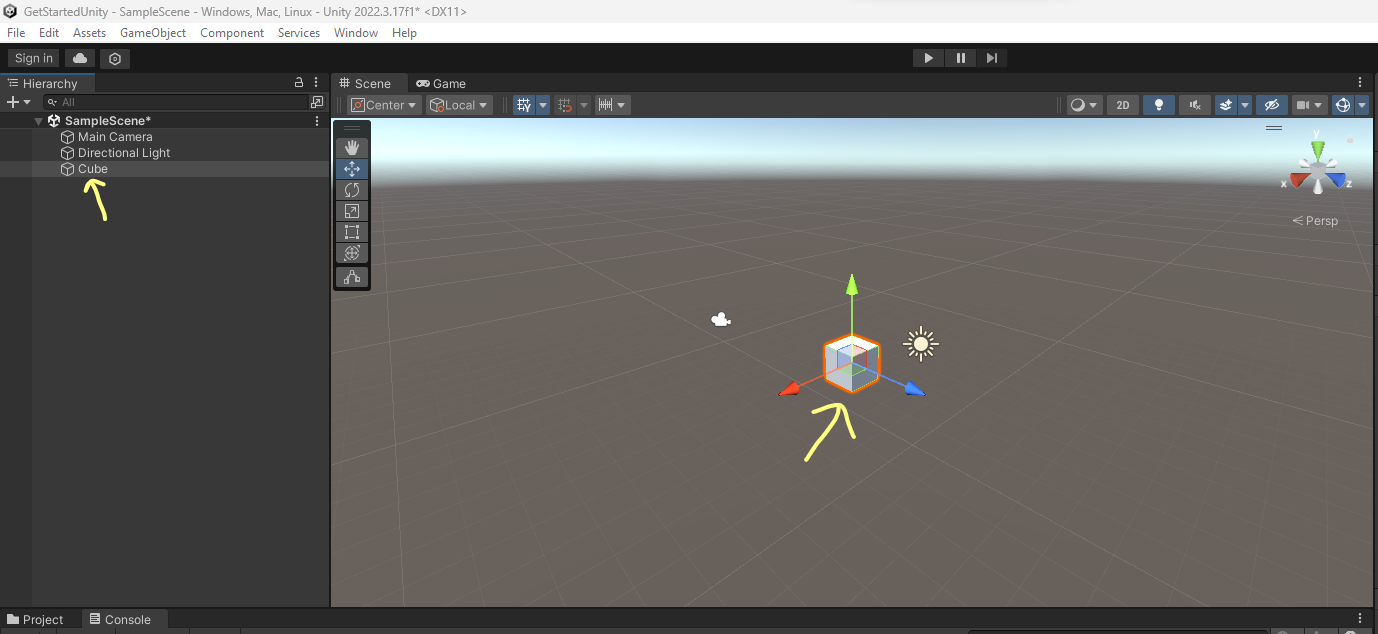
In order to investigate how to move, rotate and scale a game object, we should know how to create one. The creation of a game object can be done in the hierarchy panel. Click the + sign, find 3D Object and select a Cube.
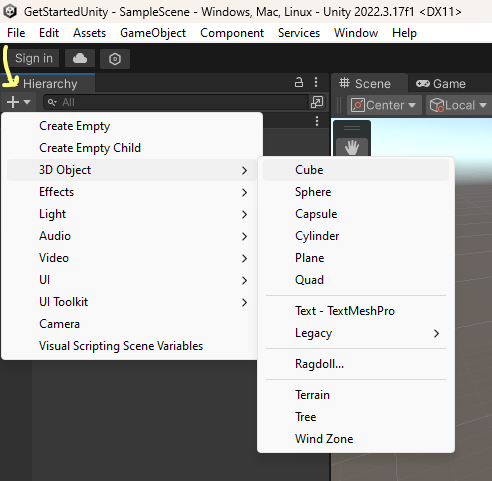
The result is a new Cube game object in our hierarchy. This cube is also drawn in the scene panel:
Moving game objects
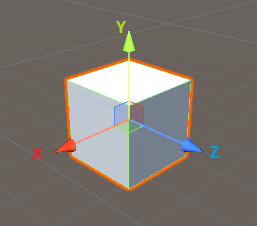
A game object can be moved over the x, y and z-axis:
Info
As we are working with 3D objects, the Z-axis comes into play. the Z-axis is the axis that represents depth or the direction coming out of the screen. In other words, positive Z values move towards you, and negative Z values move away from you.
| Axis | Direction | Color |
|---|---|---|
| X | Horizontal (left, right) | Red |
| Y | Vertical (up, down) | Green |
| Z | Depth (backward, forward) | Blue |
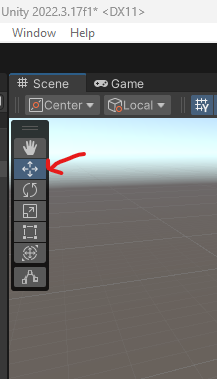
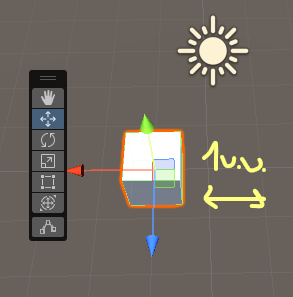
You can move the cube by selecting the Move Tool in the floating toolbar. With the Move Tool selected, click on the arrow (representing an axis) pointing in the desired direction for the object's movement, and then move your mouse accordingly.
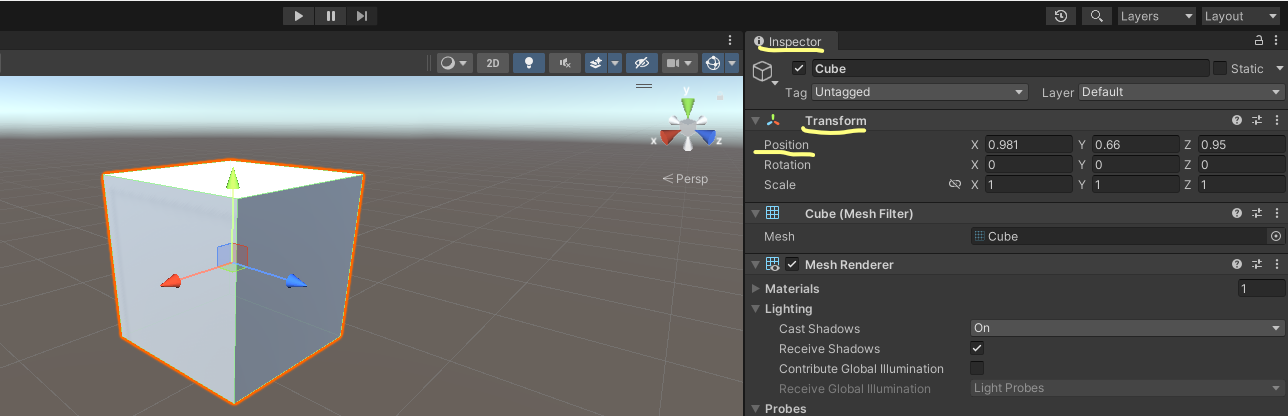
Moving the game object updates the Position properties in the Inspector panel. You can also change the values in the panel, which updates the position of the game object accordingly.
Info
- (x = 0, y = 0, z = 0) is called the universal center position in Unity
- The point where all three axes intersect is referred to as pivot
- Measurement units in Unity are called Unity units. For example changing the x value of the position to 1, moves the game object 1 Unity unit on the x-axis, which is equal to a square in the grid system:
Rotating game objects
You can rotate the cube by selecting the Rotate Tool in the floating toolbar (same toolbar as with the Move Tool). With the Rotate Tool selected, we can see spherical lines surrounding the cube.
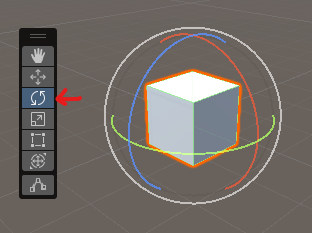
Selecting a spherical line and moving your mouse rotates the game object around the corresponding axis:
| Spherical line | Direction |
|---|---|
| Red | Move cube around x-axis |
| Green | Move cube around y-axis |
| Blue | Move cube around z-axis |
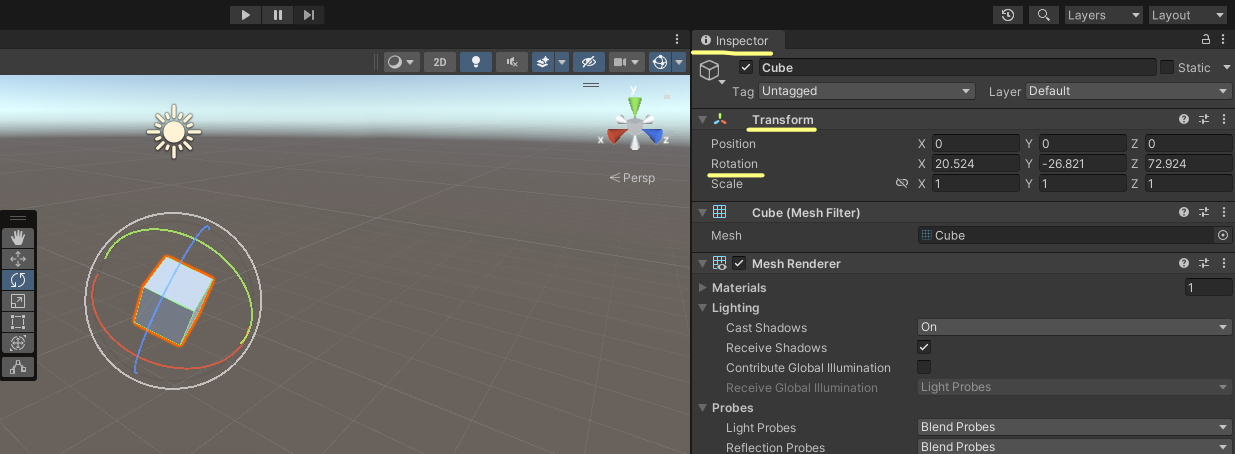
As with moving a game object, rotating the game object updates the Rotation properties in the Inspector panel. You can also change the values in the panel, which updates how the game object is rotated.
Scaling game objects
3D Scale Tool
You can scale the cube in all three dimensions by selecting the Scale Tool in the floating toolbar (same toolbar as with the Move & Rotate Tool ). With the Scale Tool selected, we can see four cubes surrounding the cube.
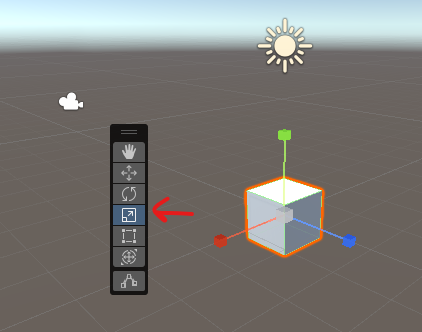
Selecting a cube and moving your mouse scales the game object on the corresponding axis:
| Cube | Direction |
|---|---|
| Red | Scale cube on x-axis |
| Green | Scale cube on y-axis |
| Blue | Scale cube on z-axis |
| Grey | Scale cube proportionally on all axes |
As with moving and rotating a game object, scaling the game object updates the Scale properties in the Inspector panel. You can also change the values in the panel, which updates how the game object is scaled.
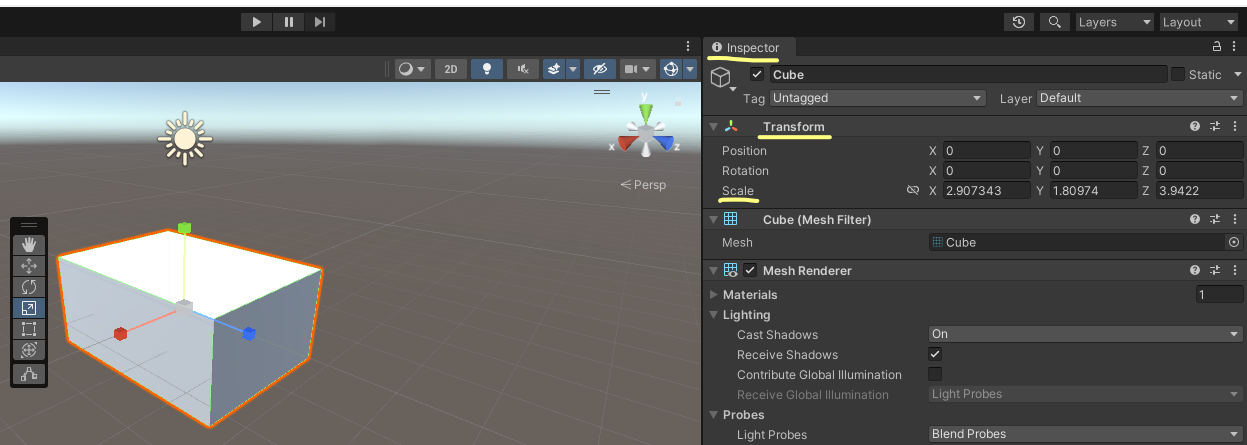
Info
- The default Scale values are x = 1, y = 1 and z = 1
2D Scale Tool (Rect Tool)
You can scale the cube in two dimensions at a time by selecting the Rect Tool in the floating toolbar (same toolbar as with the Move & Rotate Tool ). The possible combinations are x-y, y-z or x-z
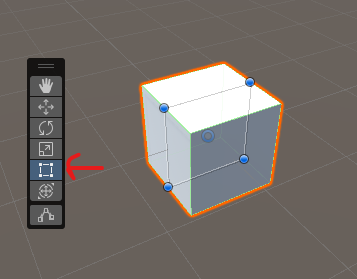
Info
- The Rect Tool is used to scale 2D elements, like buttons, images, canvas, ...
All-in-one Transform Tool
At last, there is a tool which allows you to move, rotate or scale the selected game object in one go: the Transform Tool. Everything that we explained before can now be done all at once:
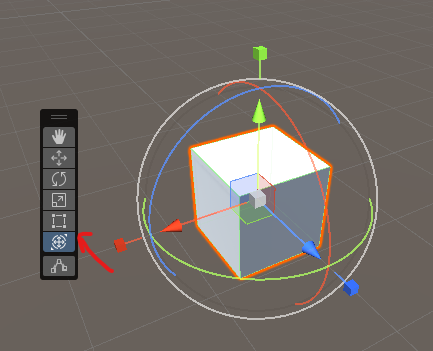
Game panel
The main purpose of the Game panel is to view and test the output of your Unity project. What you see in the game panel is the same view that you will see on your device when running the game/application.
What we see in the Game panel is the view that we get from the Main Camera. If we zoom out (a lot), we actually see what range the camera can capture. This is called the field of view. Every game object that is inside this field of view is visible inside the game panel.
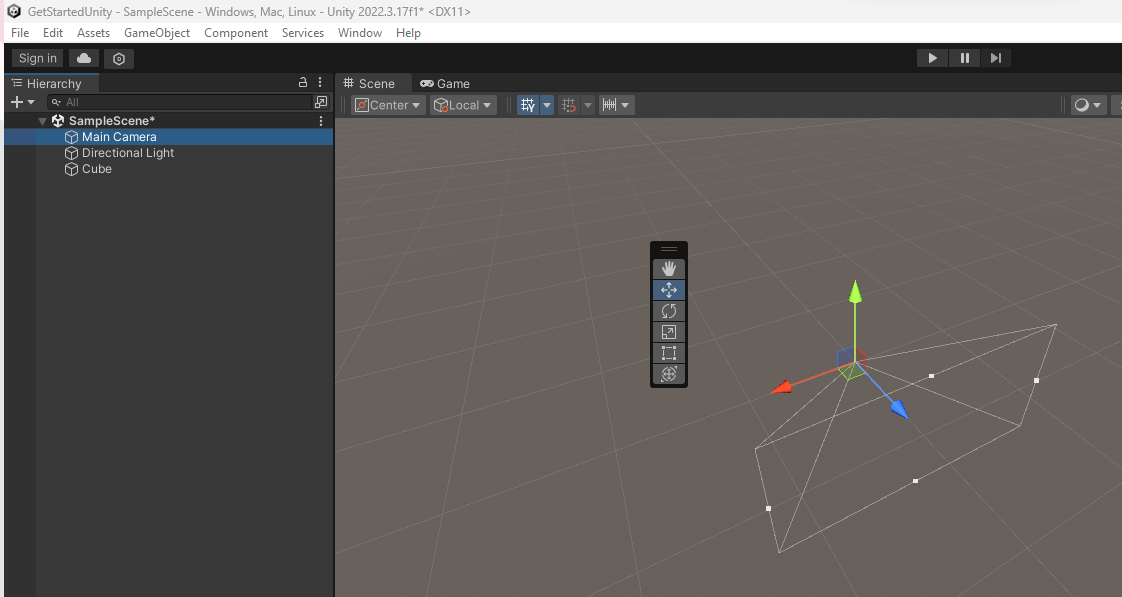
A common thing Unity developers do with the Main Camera is changing the position of the camera (by selecting it in the Hierarchy panel and using the Move Tool).
Tips
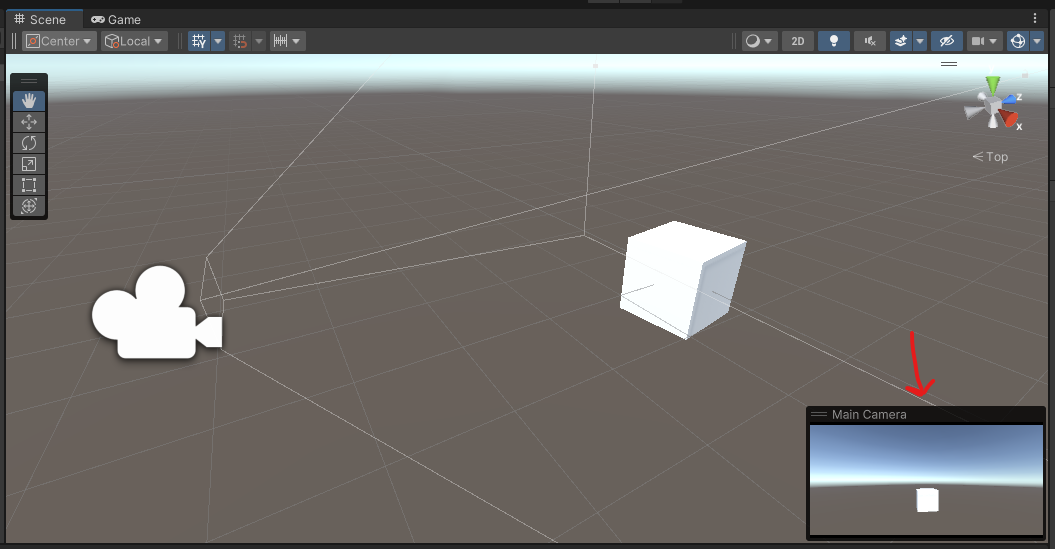
- When the Main Camera is selected, you get to see a preview (the same as what you would see in the Game panel, but smaller) of the output:
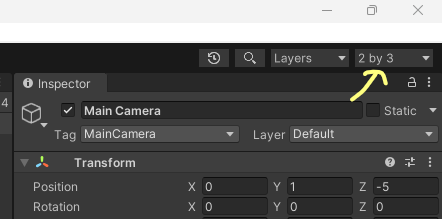
- You can change the layout mode of Unity to reposition some panels. If you for example want to have the Scene panel and the Game panel side by side, you can opt for the 2 by 3 layout:
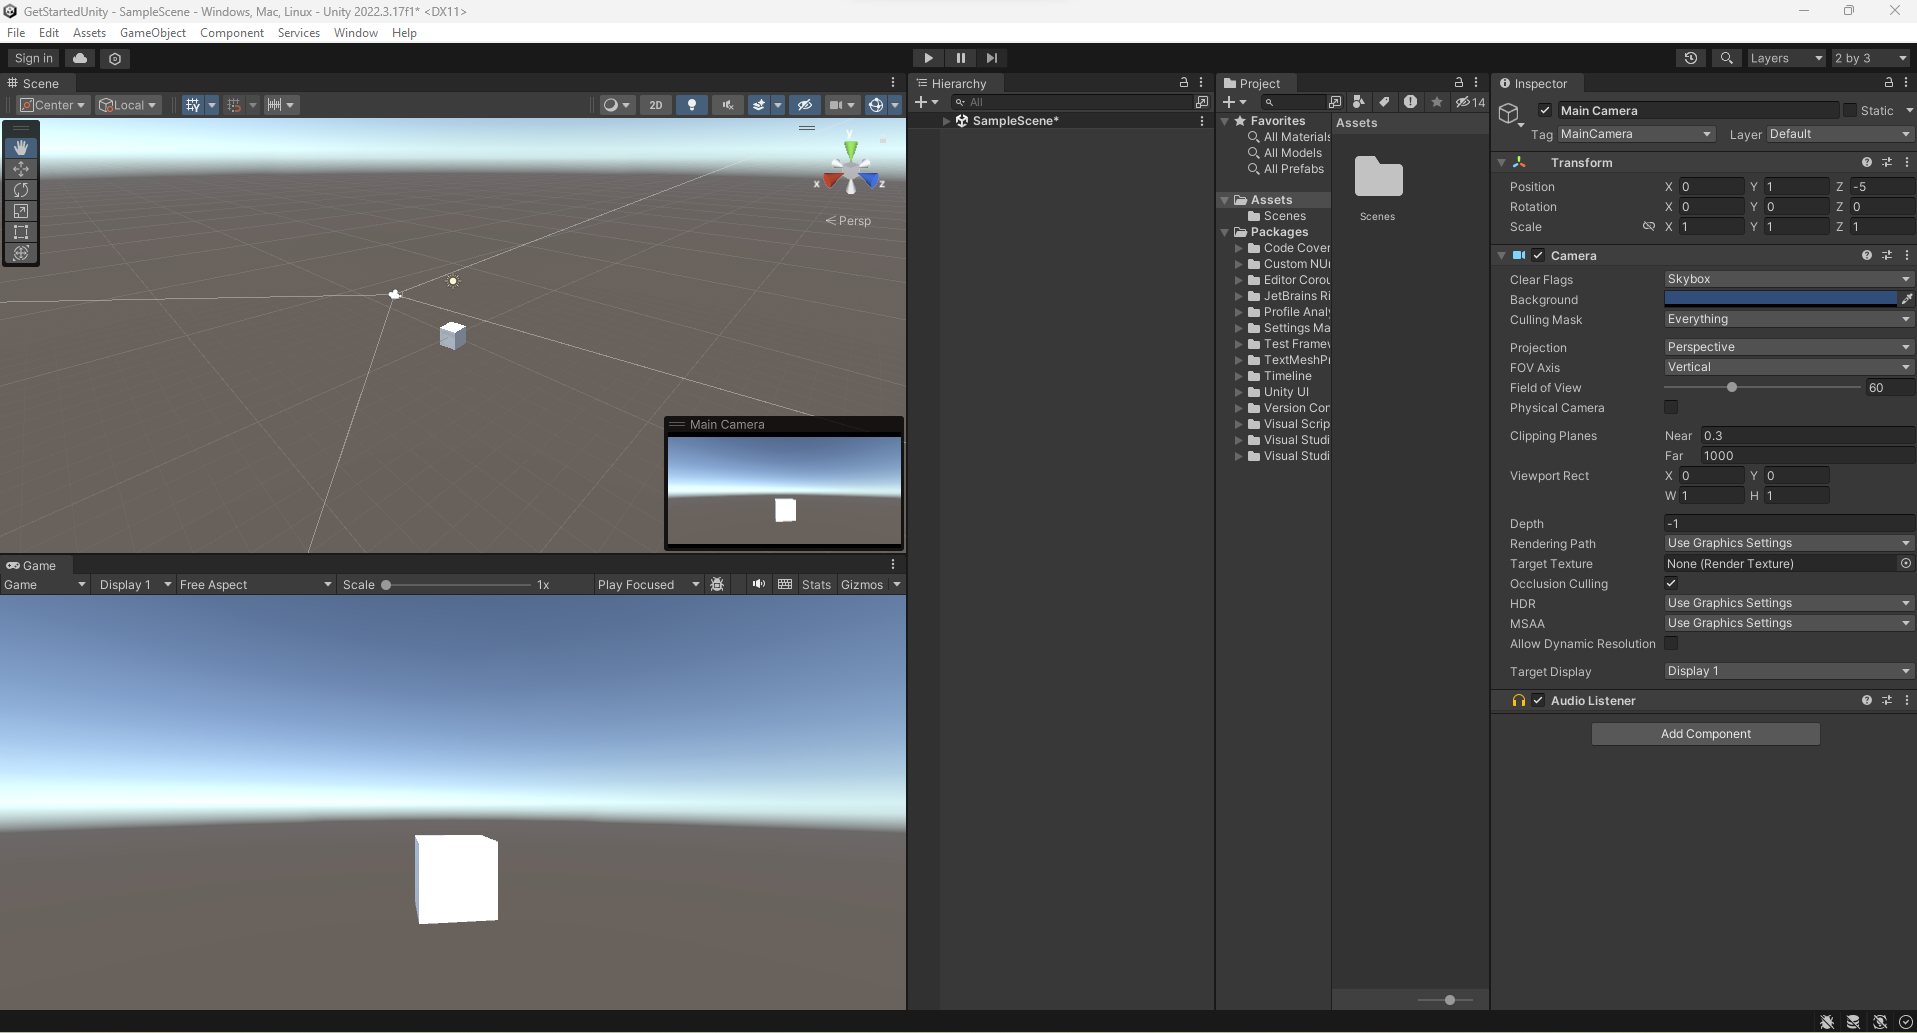
- Which results in the following layout:
Physics
In Unity, physics refers to the simulation of realistic physical behavior within the game world. Unity provides a built-in physics engine that allows developers to create games with realistic interactions between objects, such as gravity, collisions, forces, and more. The physics engine in Unity helps to make games more immersive and dynamic by simulating the way objects move and interact with each other based on real-world physics principles.
Resetting the cube
We will use our recently created cube to check out how gravity in Unity works. If you've been experimenting with moving, rotating and scaling the cube (we really recommend doing this!) it's now time to reset the cube to its original values. We could go full manual and enter 0 for the x, y, z of position and rotation and enter 1 for the x, y, z of scale, but there is a much easier way:
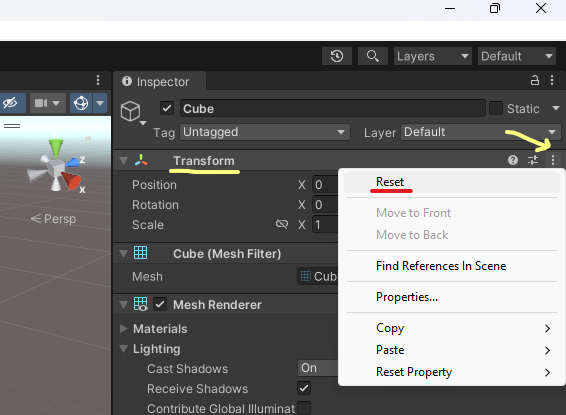
Make sure to select the cube in the Hierarchy panel and find the three dots in the Inspector panel at the far right of the Transform tab. Click on reset to restore everything to the initial values!
Flattening the cube
Exercise 1
Perform the necessary actions to
- Flatten the cube
- Make the cube fully visible through the camera
In the end your cube + camera view should be similar to the following image: 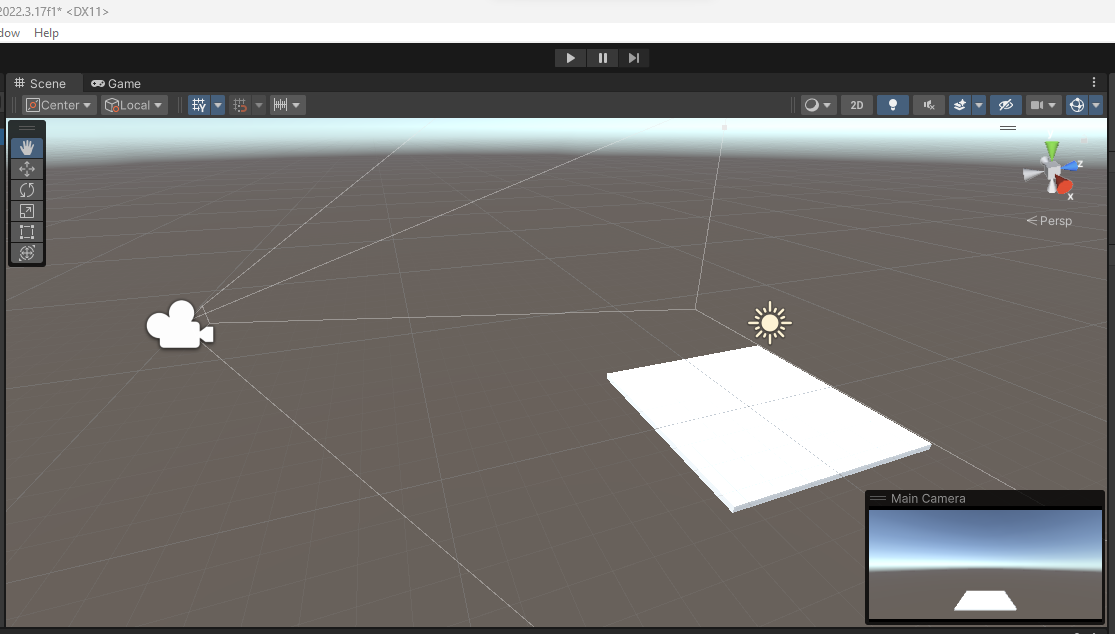
Adding a sphere
Exercise 2
Perform the necessary actions to
- Add a sphere
- Position the sphere in the middle of the cube
- Position the sphere above the cube
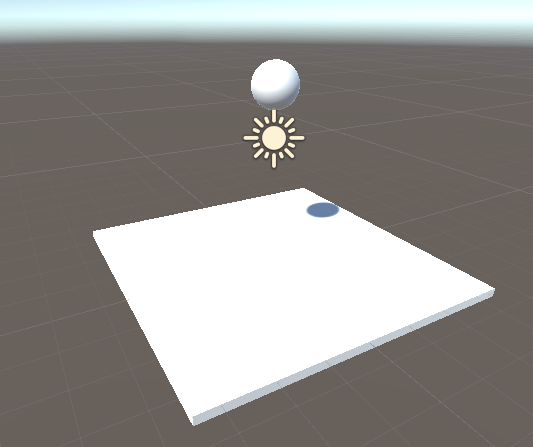
Starting our scene
It's time to play our scene and see what happens. What would you expect? Will the sphere fall on the cube? Or do we need some more configuration to let gravity do its work?
To play our scene, click the play button in the top center of Unity:
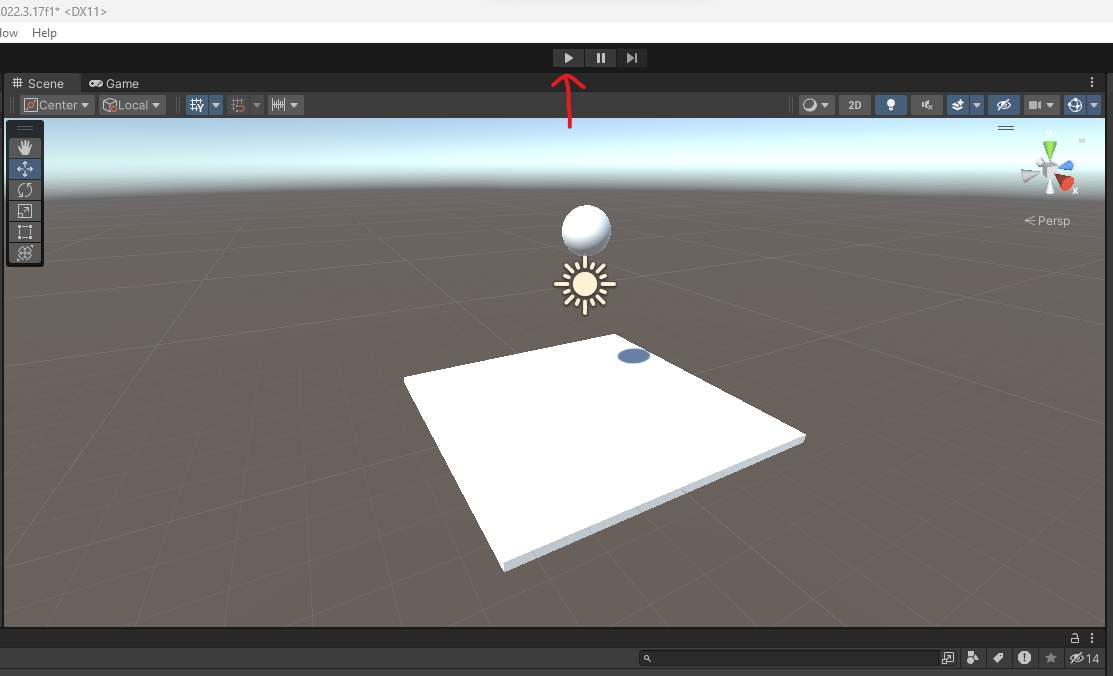
You will notice that
- The play button turns blue, which means we are playing!
- The Game panel opens, this is, as you already know, the output of our project
- The sphere is not falling down!
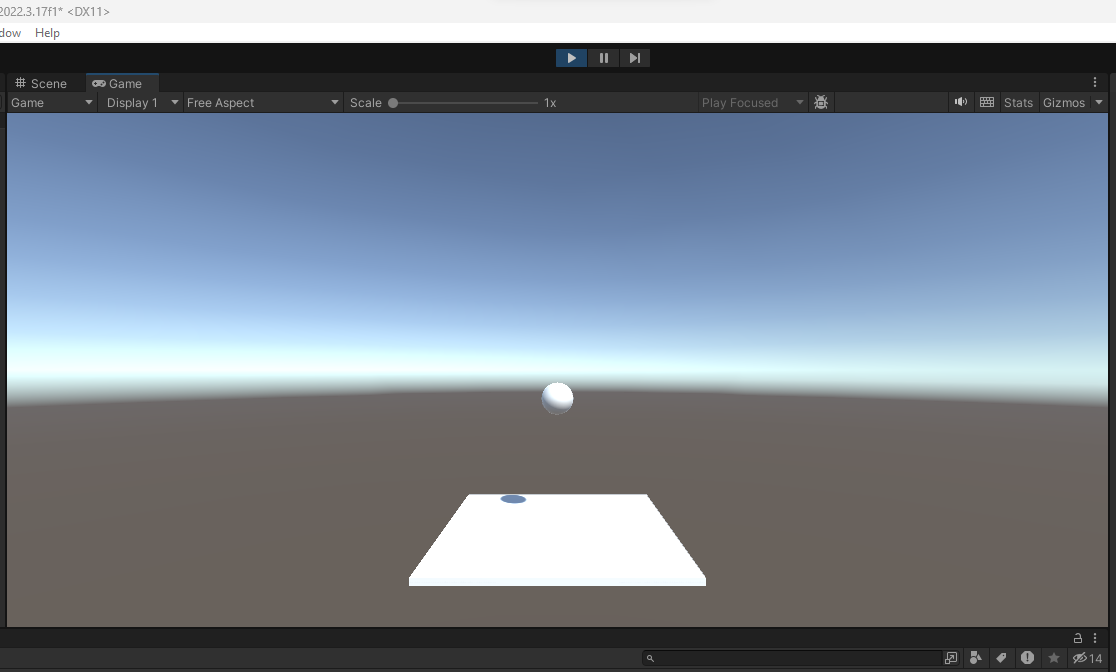
Click the play button again to exit play mode.
Adding physics to the sphere
Adding physics to a game object can be done by
- Selecting the game object (our sphere) in the Hierarchy panel
- Going to the bottom of the Inspector panel and clicking the Add Component button
- Choosing the Rigidbody component This will add the Rigidbody component to the sphere, offering you to apply some physics
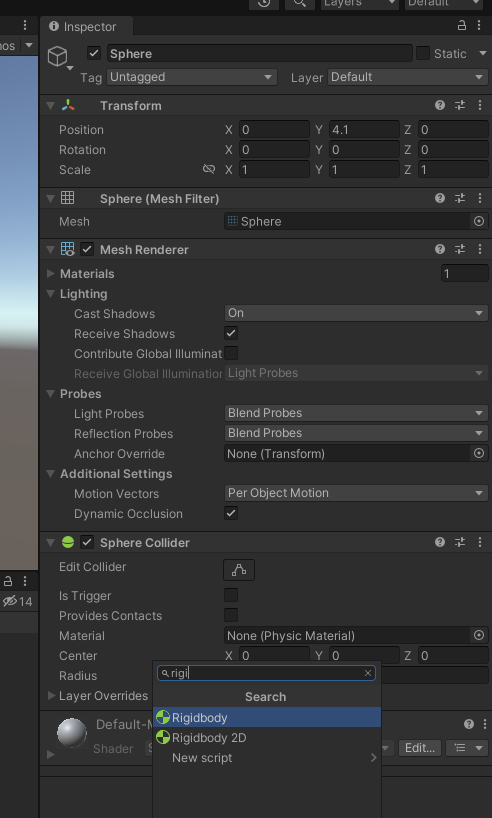
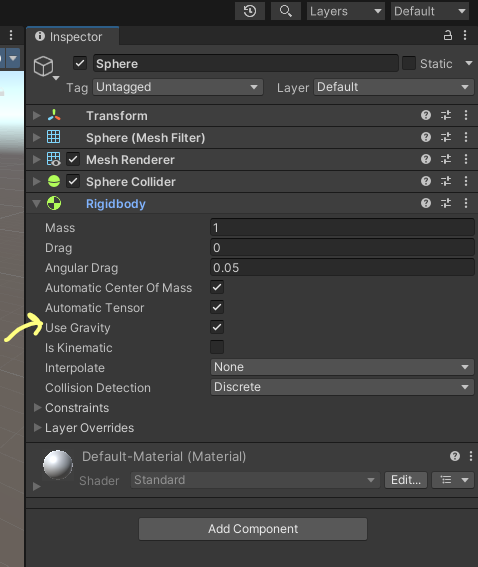
If we start playing our scene again, we will now see the sphere falling on our cube.
Don't make changes when in play mode!
Changes made when you were in play mode are NOT saved and will therefore be lost when exiting play mode!
Game object customization
Colors
By default our 3D objects are white. To give them another color, we'll have to create a Material, representing that color.
Follow us along by performing the following steps:
- Locate the Project panel
- Find the Assets folder
- Right click to create a new Materials folder
- Inside the Materials folder right click to create a new Material named Red
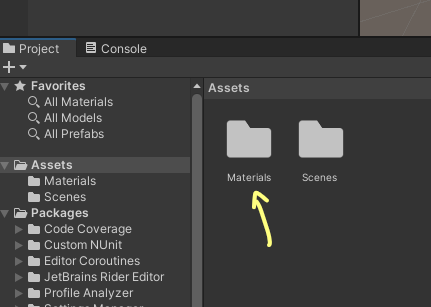
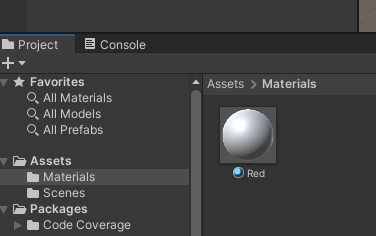
- Click on the Red Material
- Find the color picker in the Inspector panel
- Pick some kind of red color
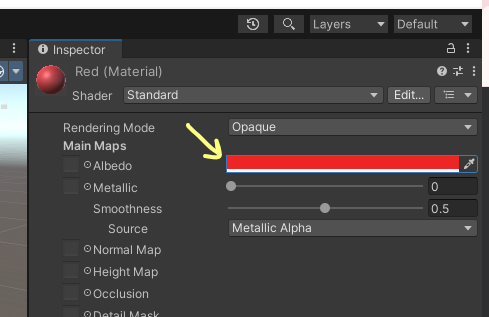
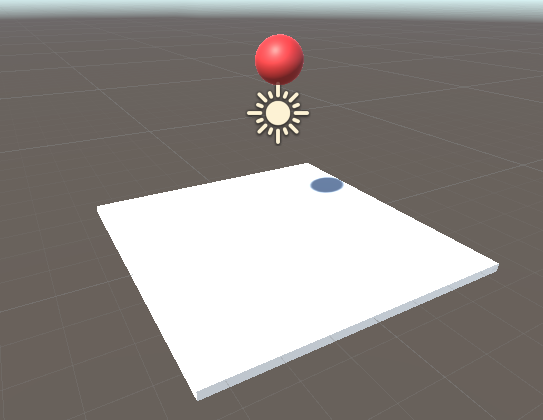
- Apply our Red Material to the sphere by dragging it from the Materials folder onto the sphere. This can be the sphere in the Hierarchy panel OR the sphere in the Game panel
Exercise 3
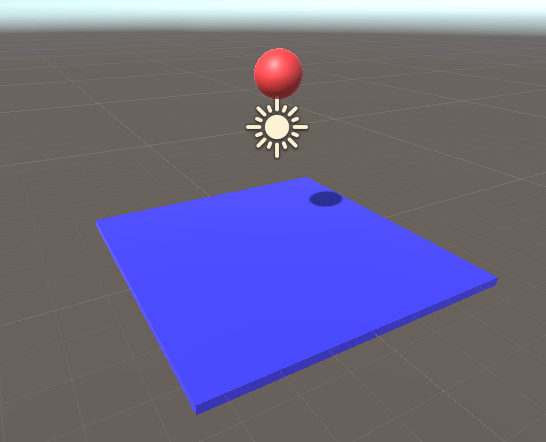
Follow the same steps to give our cube a blue color.
Changing colors
If you want to change the color, you will have to select the corresponding material and pick a new color. This will affect every game object that has that material attached!
Textures
In game development, a texture is an image or a set of images applied to the surface of a 3D model or a 2D sprite to give it a visual appearance. Textures are a crucial aspect of game graphics as they contribute to the realism and detail of game environments. They are used to define the color, pattern, and surface characteristics of objects in a game.
Let's add a texture to our project and apply it on our cube.
- Find yourself a texture online (Google, Pexels, ...) or download this wood texture
- Create a new folder Textures in the Assets/Materials folder in the Project panel
- Drag the texture in the Textures folder
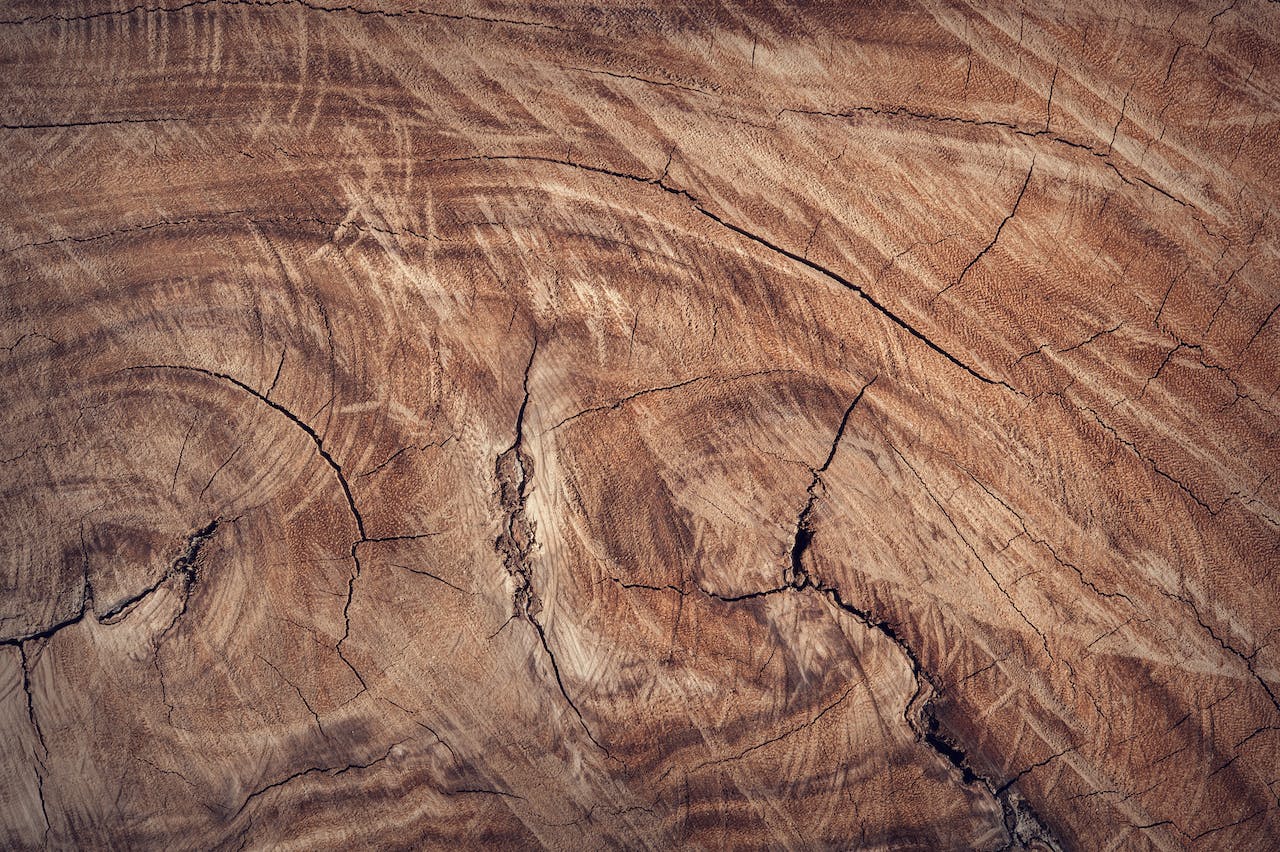
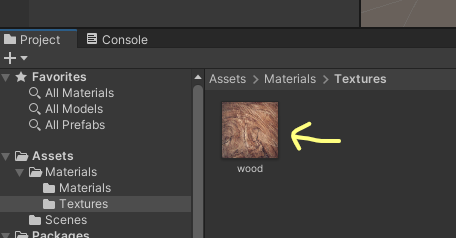
Add the texture to the cube by performing the following steps:
- Create a new Material (in the Materials folder)
- Lock the Inspector Panel
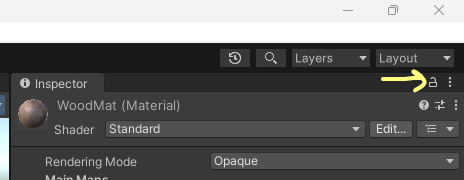
- Navigate to the created texture in the Project panel and drag it into the square left of the Albedo property
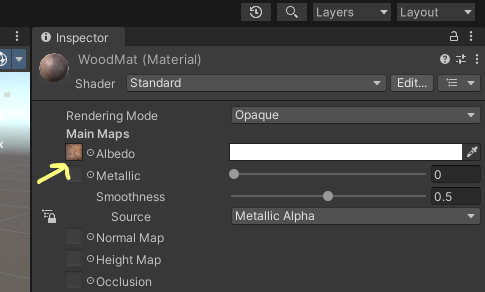
- Select the Material again
- Unlock the Inspector Panel
- Apply the Material the cube in the same way as you would do with colors
Nice to know
- Materials of a game object can be added/modified/removed in the Mesh Renderer tab in the Inspector panel
- You can also add a texture to a game object bij dragging it (the image) from the Project panel onto the game object in the Hierarchy panel. Try this out with the sphere and notice the new Material which is automatically created.
- The Albedo property controls the base color of the surface.
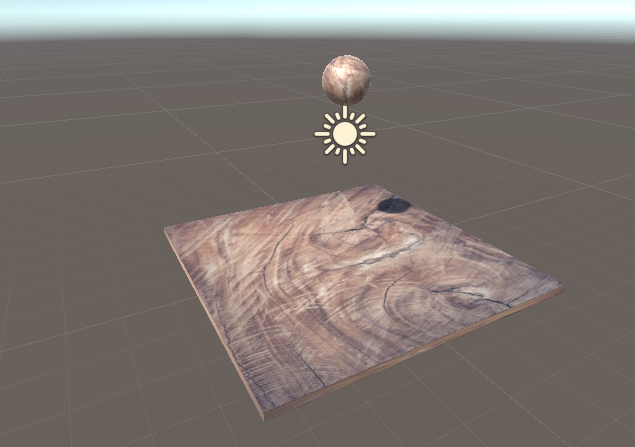
The result should look similar to this:
Copyright
Be cautious with copyright when using images from the internet!
Parent & Child game objects
In Unity, parent and child game objects play a crucial role in organizing and structuring your game scenes. Think of a parent game object as a container that holds one or more child game objects. This relationship forms a hierarchy where changes made to the parent affect its children.
Parenting allows you to move, rotate, or scale multiple objects simultaneously by simply manipulating the parent. This simplifies the process of managing complex scenes, as transformations applied to the parent are automatically inherited by its children.
Moreover, parent-child relationships facilitate modular design and enhance workflow efficiency. You can group related objects together under a parent, making it easier to organize and edit your scene elements.
Drag & drop in Hierarchy panel
You can create parent-child relationships by dragging one game object on another in the Hierarchy panel. The game object you are dragging will become the child. Try this out by making the sphere a child of the cube:
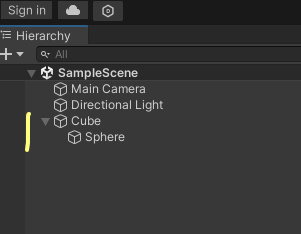
With the cube parent game object selected, you can now move, rotate and scale both the parent & child component(s) at once!
You can of course control a child game object seperately by selecting it in the Hierarchy panel.
Exercise 4
Perform the necessary actions to
- Add a new empty game object and name it CubeSphereHolder
- Reset the position to (0,0,0)
- Make the cube and the sphere child game objects of the CubeSphereHolder.
- Unchild the sphere from the cube, they should be on the same level
Prefabs
Prefabs are a powerful feature that streamline game development by allowing you to create reusable templates of GameObjects. A prefab is essentially a pre-configured GameObject that can be instantiated multiple times in a scene.
Prefabs are created using existing game objects. It's some kind of blueprint of a game object.
Exercise 5
Perform the necessary actions to
- Unchild the sphere game object from the CubeSphereHolder
- Select the sphere in the Hierarchy panel and drag it into the Assets folder in the Project panel. This should create a Sphere prefab
- Use this Sphere prefab to add 2 more spheres to the scene
- Drag it into the Hierarchy panel or directly somewhere in the Scene
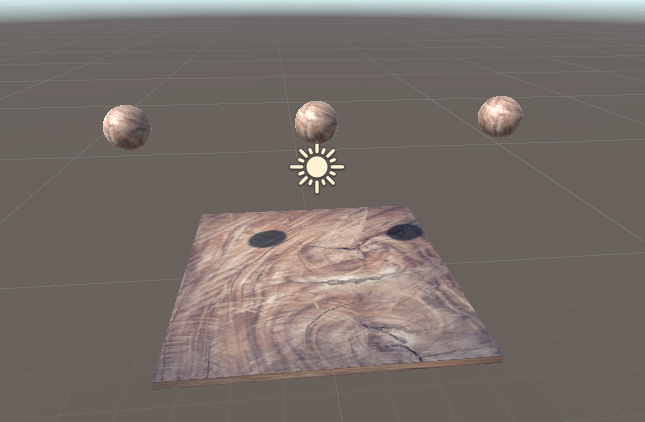
Changes made to this prefab are automatically applied to all instances created from this prefab. You can try it yourself by selecting the prefab and changing some properties in the Inspector panel
Exercise 6
Perform the necessary actions to
- Create a new Prefabs folder in the Assets folder
- Drag the Sphere prefab into the Prefabs folder you just created
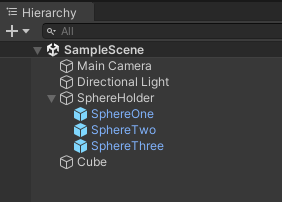
- Create an empty game object and put it in exactly the same position as the middle sphere
- Try to copy the Transform properties from the middle sphere by selecting the three dots and select Copy, Position (Inspector panel)
- Paste the position on the empty game object in a similar way
- Group the three spheres in this empty game object
- Unchild the Cube and remove the CubeSphereHolder
Scripts
Scripts are used to define the behavior of game objects, such as how they move, interact with other objects, and respond to user input. They are written in the C# programming language.
Scripts are an essential part of Unity, as they allow developers to create custom behaviors and interactions for their games. They are used to add functionality to game objects, such as making them move, rotate, or change color. Scripts can also be used to create custom user interfaces, control the camera, and more...
Let's create our first script!
- Create a new Scripts folder in the Assets folder
- Right-click in this folder, create a new C# Script and name it RotateSpheres
- Double-click the script to open it
VS Code
By default, Unity will open Visual Studio to let you edit the C# script. If you prefer a more lightweight IDE, VS Code is a great alternative. How to?
- Go to Edit - Preferences - External Tools
- Select Visual Studio Code as External Script Editor
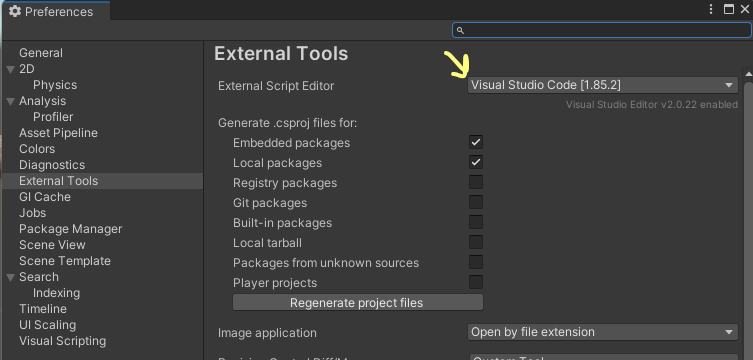
- The first time you open a script in VS Code, it's best to install the Unity plugin as it suggests you to do:
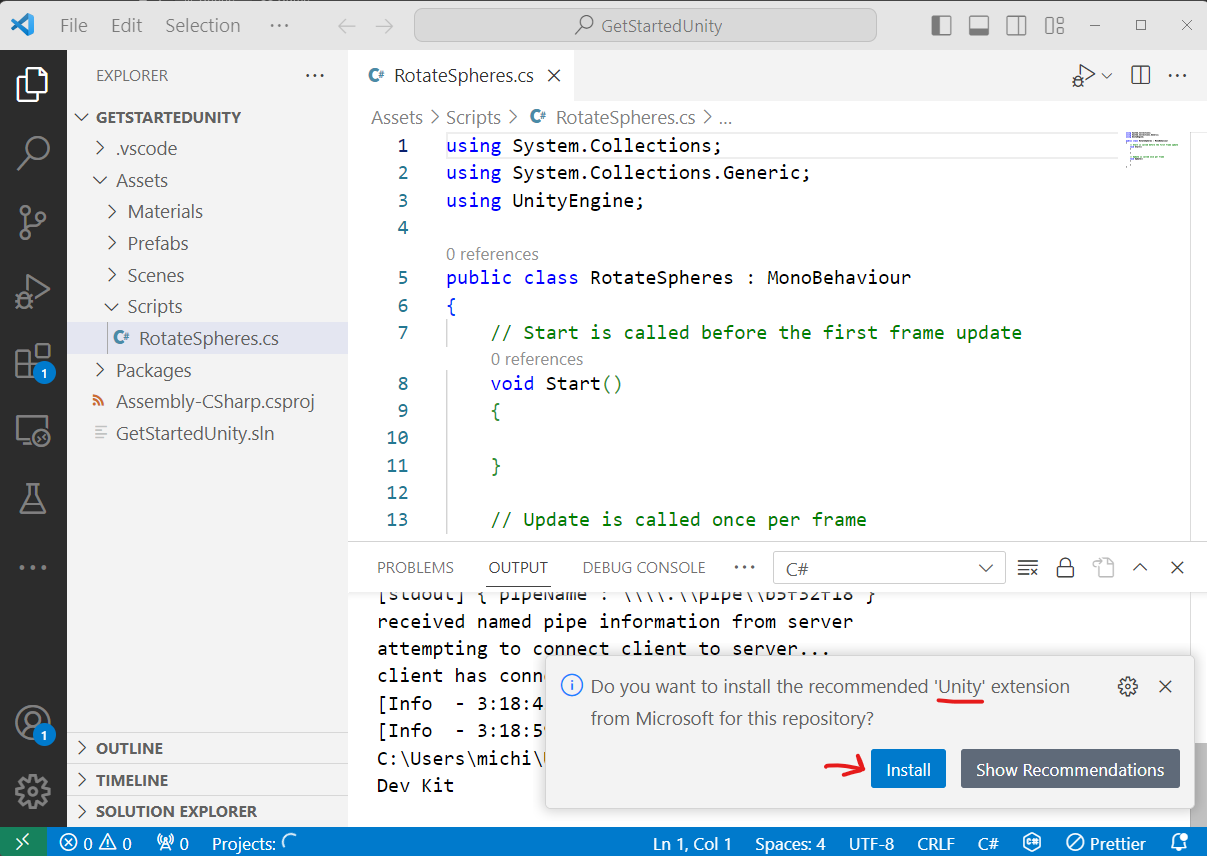
- In this course we will use VS Code as IDE for the C# scripts
Rules about scripts!
- First letter should always be capital
- No spaces allowed in the name
A newly created C# script contains the following code:
using System.Collections;
using System.Collections.Generic;
using UnityEngine;

public class RotateSpheres : MonoBehaviour //Inheritance: base class that is derived from
{
    // Start is called before the first frame update
    void Start()
    {

    }

    // Update is called once per frame
    void Update()
    {

    }
}
Unity Documentation
Find more information about the MonoBehaviour class in the Unity Documentation
Rotating
Time to add some code to rotate our spheres. Check the code we have to add to the script:
using System.Collections;
using System.Collections.Generic;
using UnityEngine;

public class RotateSpheres : MonoBehaviour //Base class that Unity scripts derive from
{
    Vector3 movement; //Representation of 3D vectors and points

    // Start is called before the first frame update
    void Start()
    {
        movement = new Vector3(0, 30, 0); //x, y, z
    }

    // Update is called once per frame
    void Update()
    {
        //Per frame called, we execute the Rotate method, so 30 is added to the Y rotation of the game object
        transform.Rotate(movement);
    }
}
When our script is ready, we should attach it to our 3 spheres. We could do this one by one, but remember the prefab we created in the previous topic! Attaching the script to the prefab will attach it to all our spheres at once!
- Go to the Sphere.prefab in the Project panel
- Select the Sphere.prefab
- Lock the Inspector panel
- Navigate to the RotateSpheres script in the Project panel
- Drag the script somewhere in the Inspector panel. A blue line should appear when you can drop it!
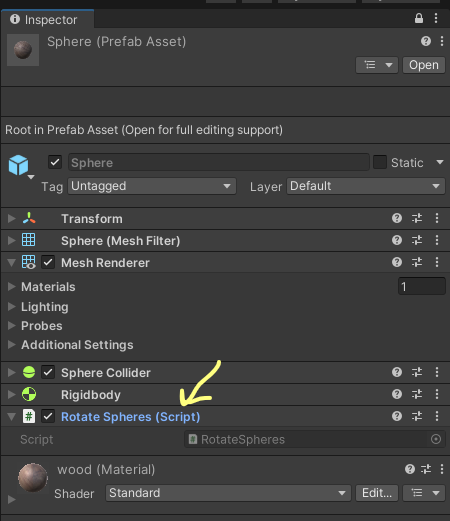
Click the play button and you should see all three spheres rotating.
Gravity
At the moment our spheres are falling down because of the gravity. Try to put it off for testing purposes.
Exercise 7
- Try to slow down the rotation of the spheres
- deltaTime could be a good idea: it represents the time in seconds it took to complete the last frame. It's often used to make movements frame-rate independent, ensuring smooth animation regardless of frame rate.
- Search the Internet how to use deltaTime.
Exercise 8
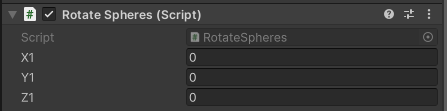
If we want to change the y rotation, we now have to open the script and change the value in the movement vector. There is a better way, a way where we can change the property values inside Unity! How? By creating public properties! Because you are all programming experts, creating a public property is a piece of cake, no?
- Create three public int properties:
- x1, y1 and z1
- Use these properties when instantiating the movement vector
- Get back to the Sphere.prefab and find the three properties in the Inspector panel
- Play around with them!